How to Draw a Christmas Tree
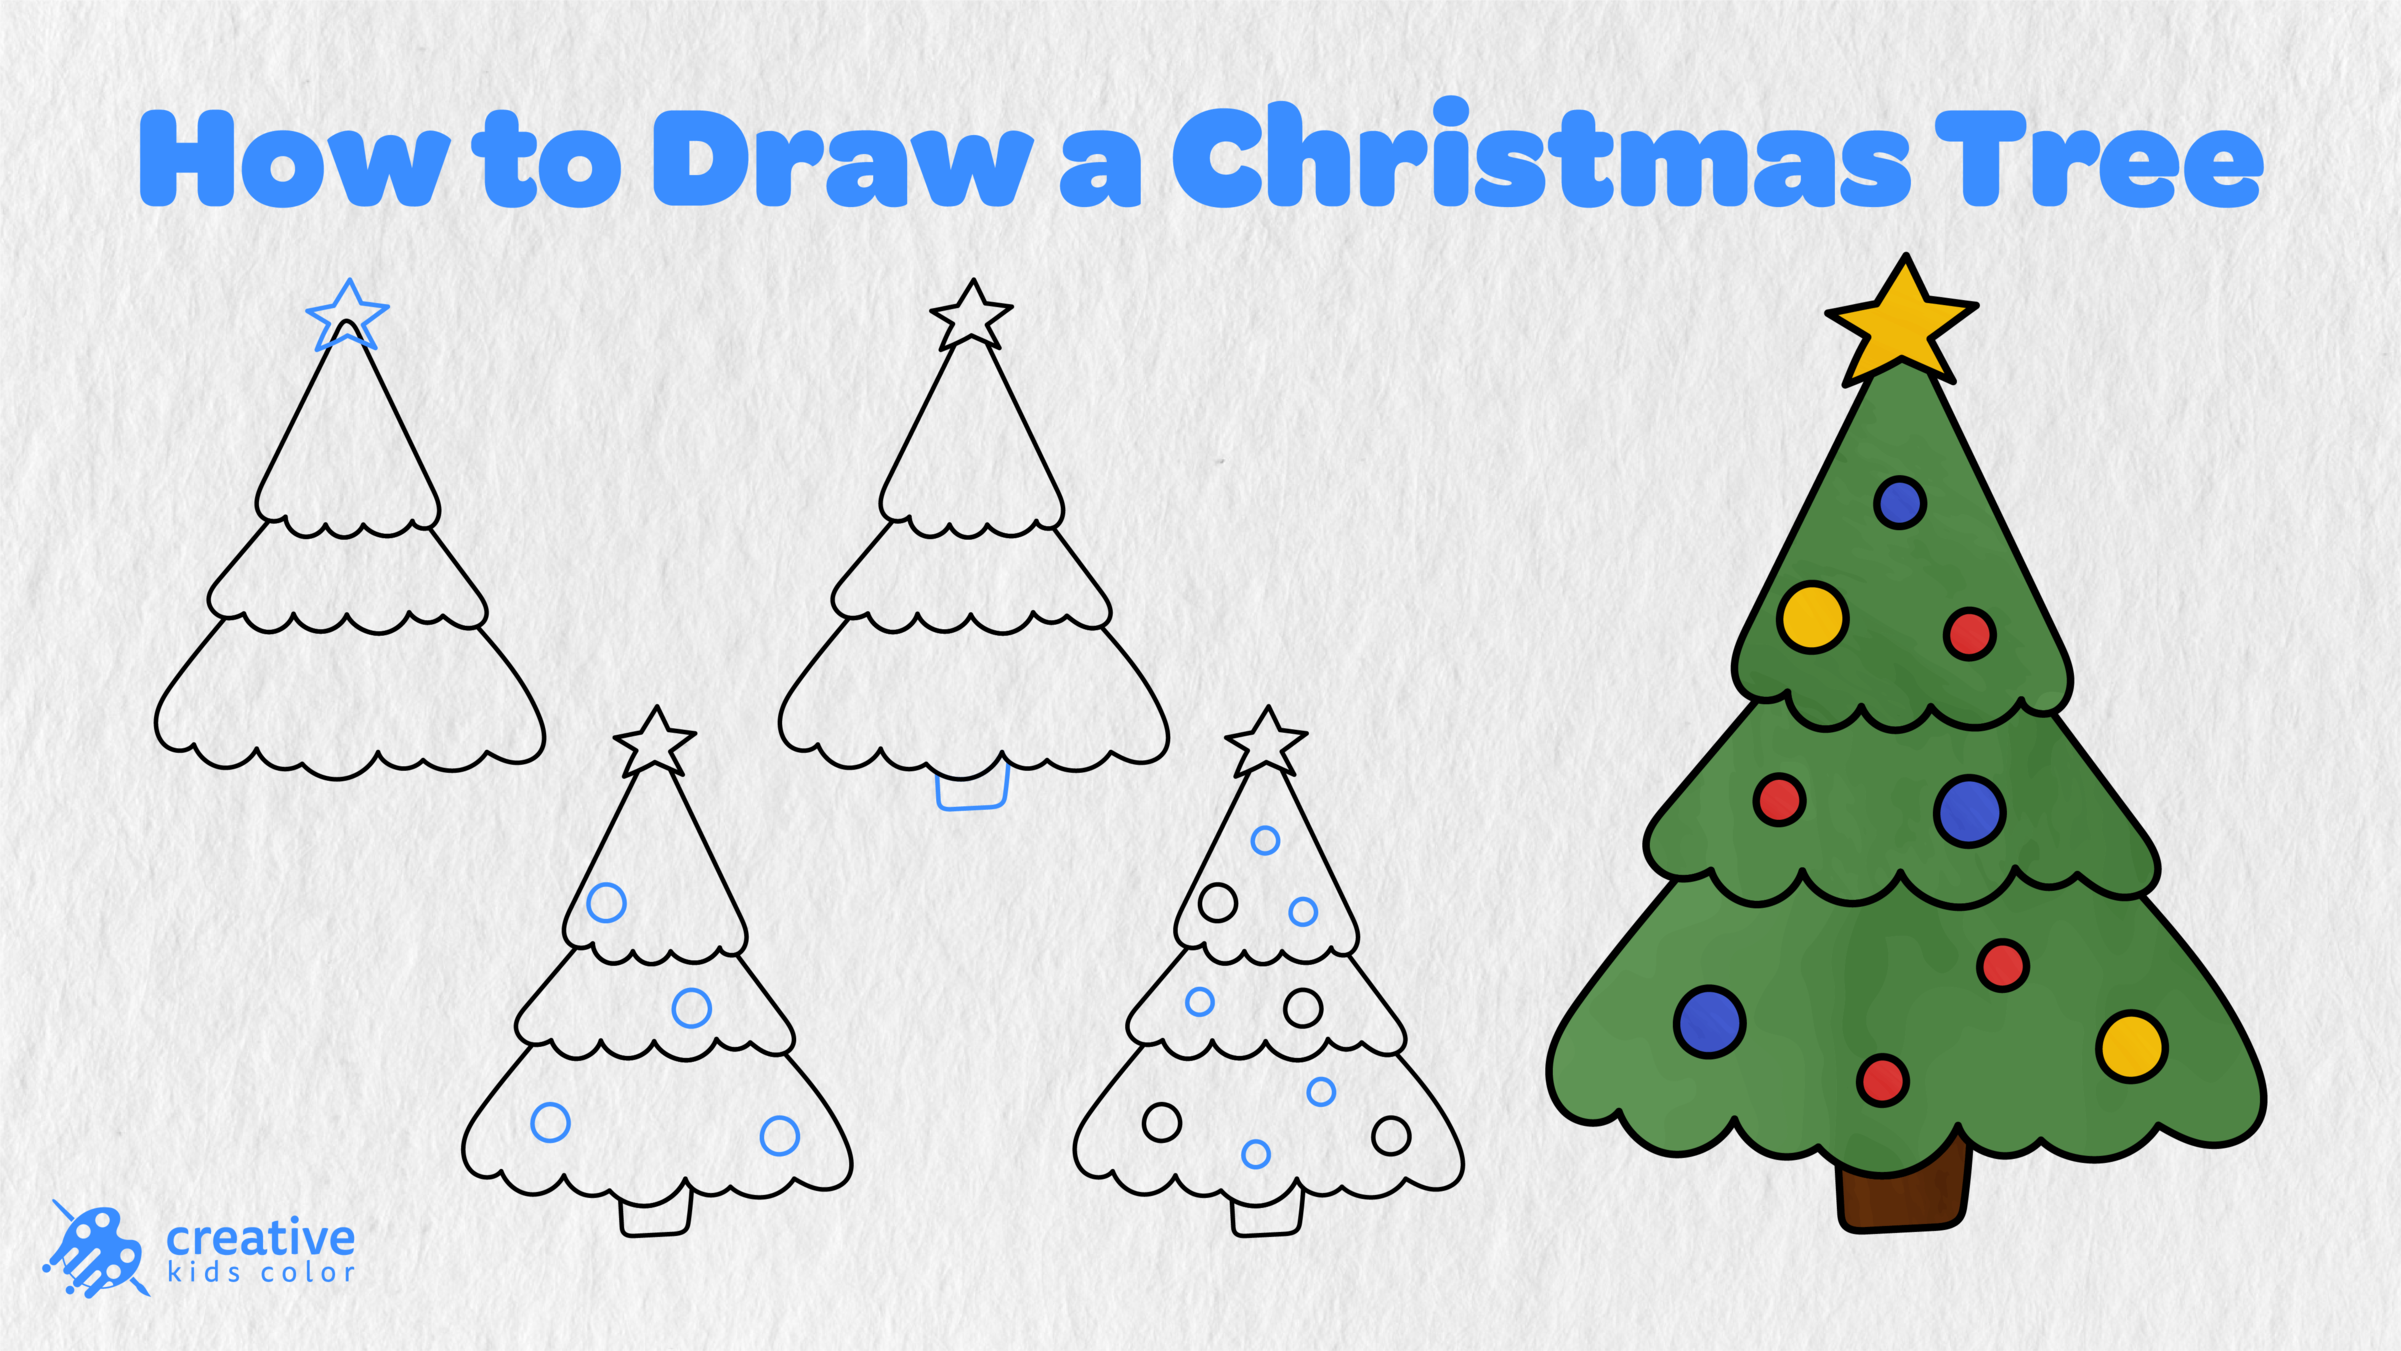
With its beautiful branches, colorful decorations, and a bright star on top, a Christmas tree is one of the most festive things to draw during the holiday season. In this step by step drawing guide, you will learn how to draw a Christmas tree by sketching three simple tree layers, adding a trunk, decorations, and color.
The drawing instructions are designed for kids and beginners who want to learn how to draw a simple Christmas tree without using complex techniques and shading. Follow the images below and the final drawing as a reference when you need to color your own tree.
The guide will show you how to draw a Christmas tree starting from a large triangle and several guide lines. However, these basic elements will turn into a lovely decorated tree with a star, several round ornaments, and even more details. Moreover, the rounded tree branches suggest a softer and friendlier appearance, while the star and ornaments add a festive holiday cheer.
Easy Christmas Tree Drawing Step by Step
Before you begin, get a pencil, paper, eraser, and coloring tools. The blue lines in the images below show the new parts added in each step, while the guide lines from the first step can be erased after the main outline is complete.
Step 1: Draw the Christmas Tree Guide Shape
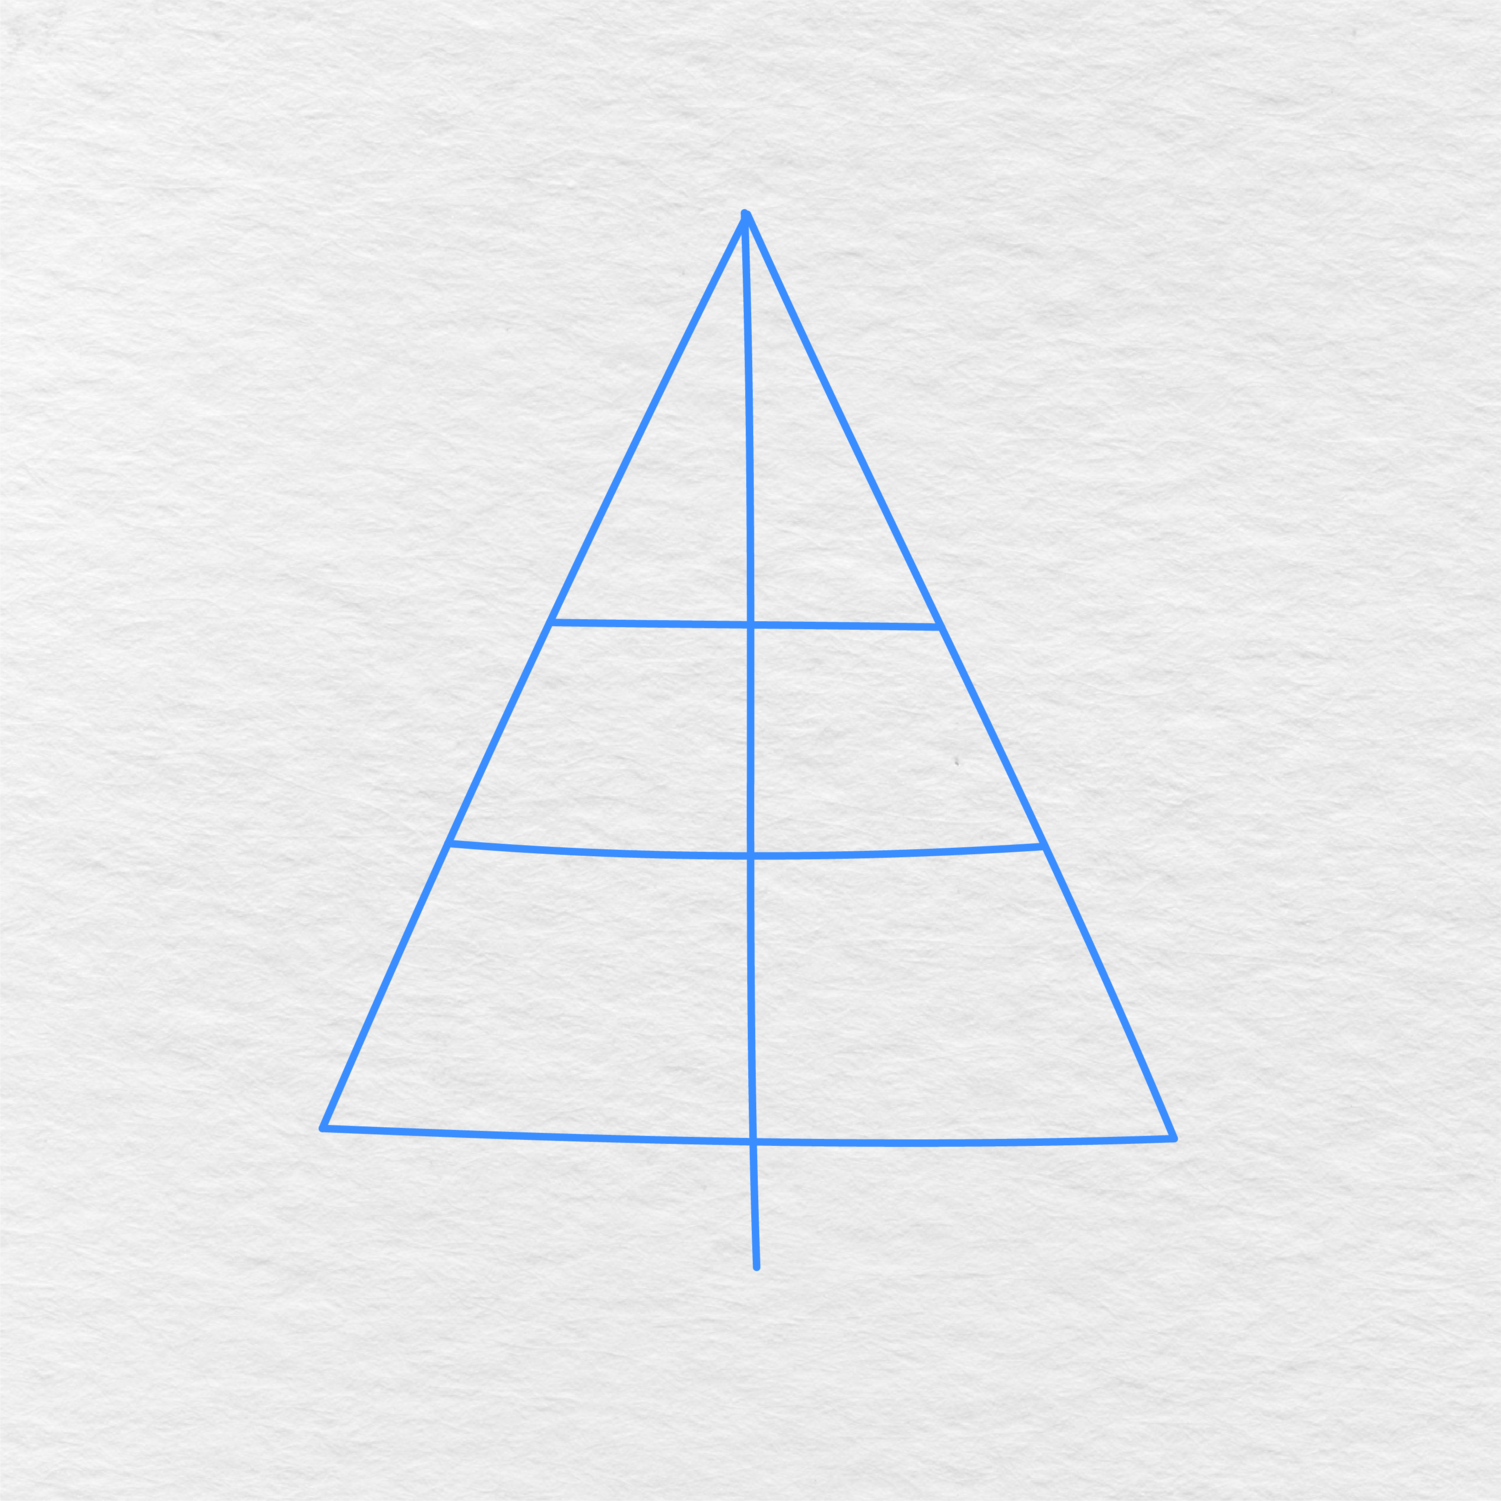
Begin the Christmas tree drawing by creating a rough sketch of the tree. Use a large triangle in the middle of the page, add a vertical guide line, and two almost horizontal lines at different levels.
These guide lines will help you to draw tree layers one after another and keep their proportions.
Step 2: Draw the Top Tree Layer
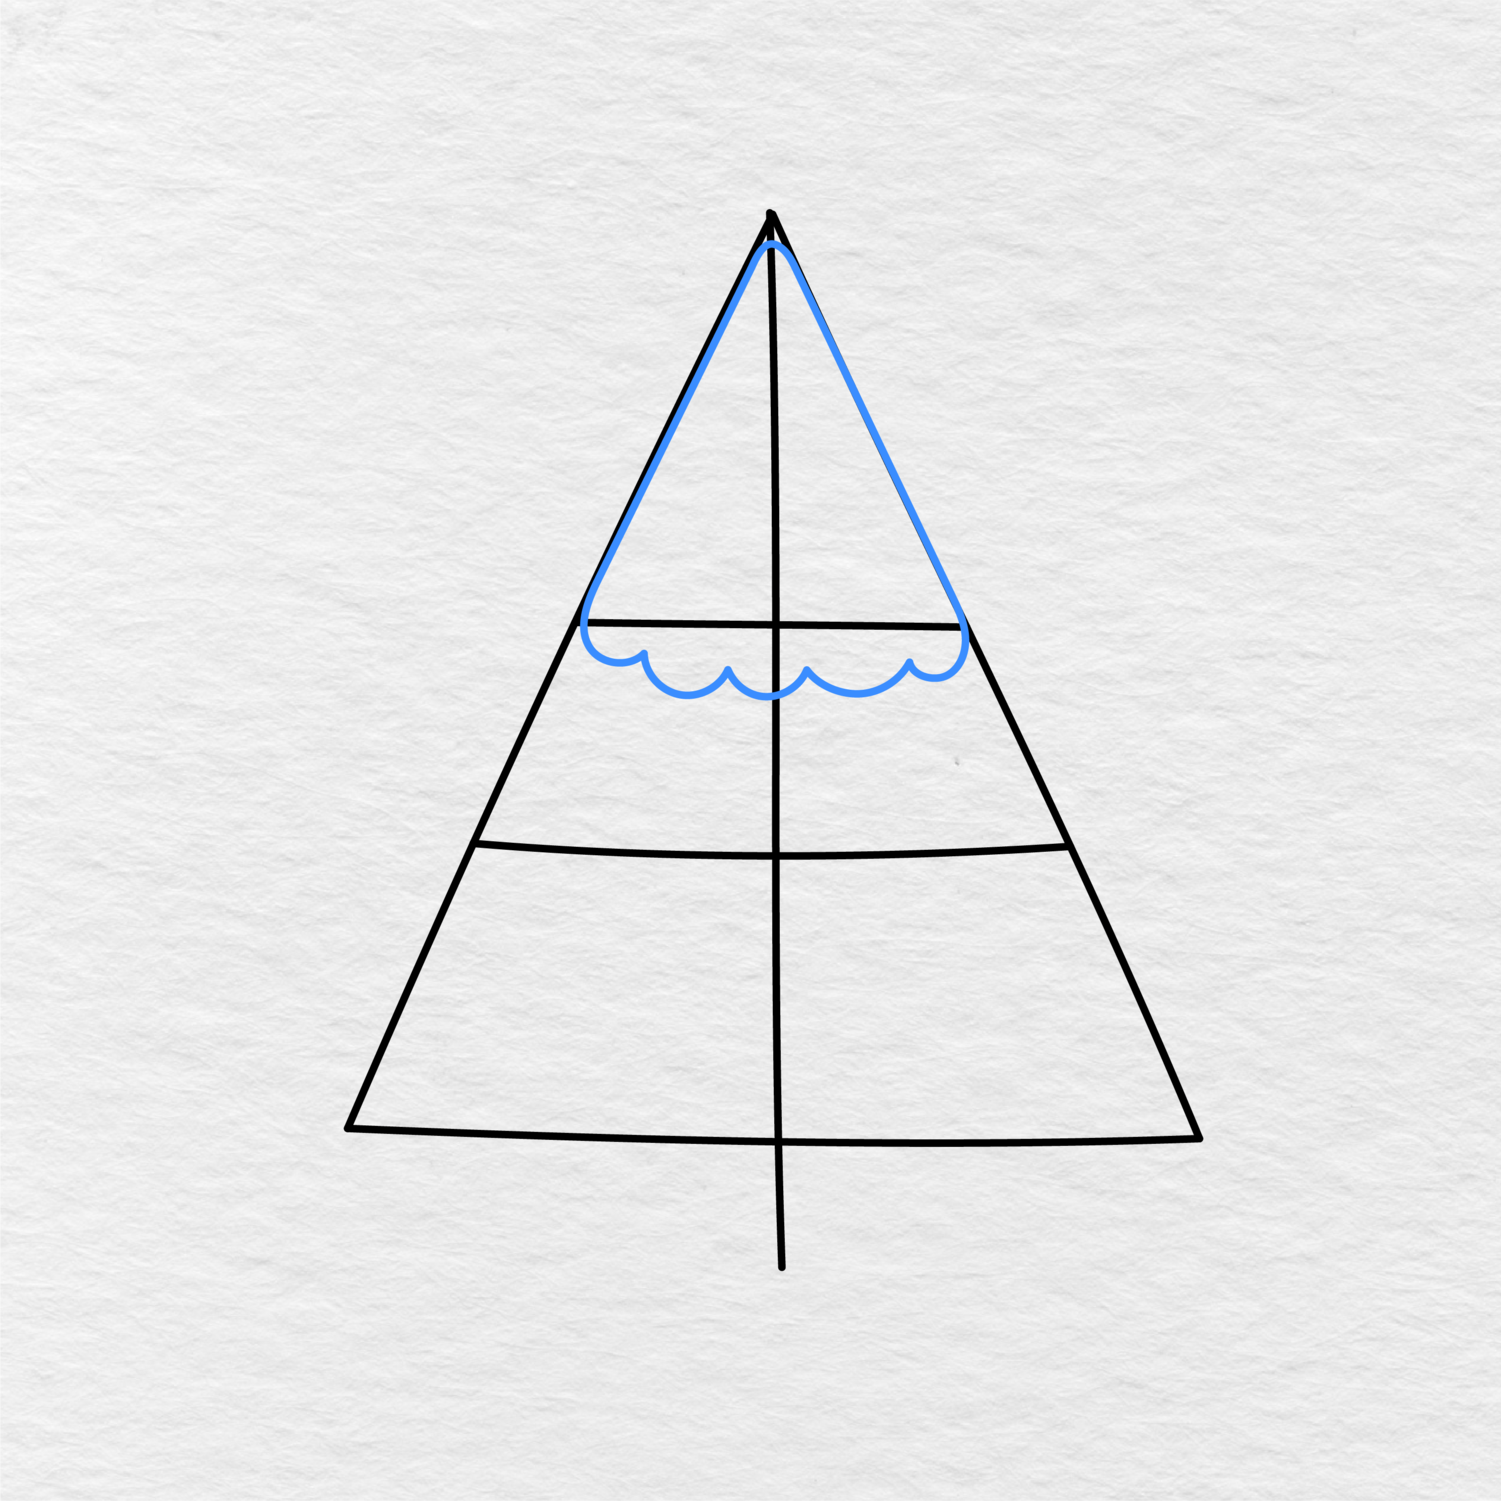
Use the top layer of the guide shape and draw the top tree layer by following the sloping lines and adding a row of small rounded curves at the bottom.
The top layer should be narrower than the middle and bottom tree layers. After you have completed the top tree layer, proceed to the middle layer.
Step 3: Add the Middle Tree Layer
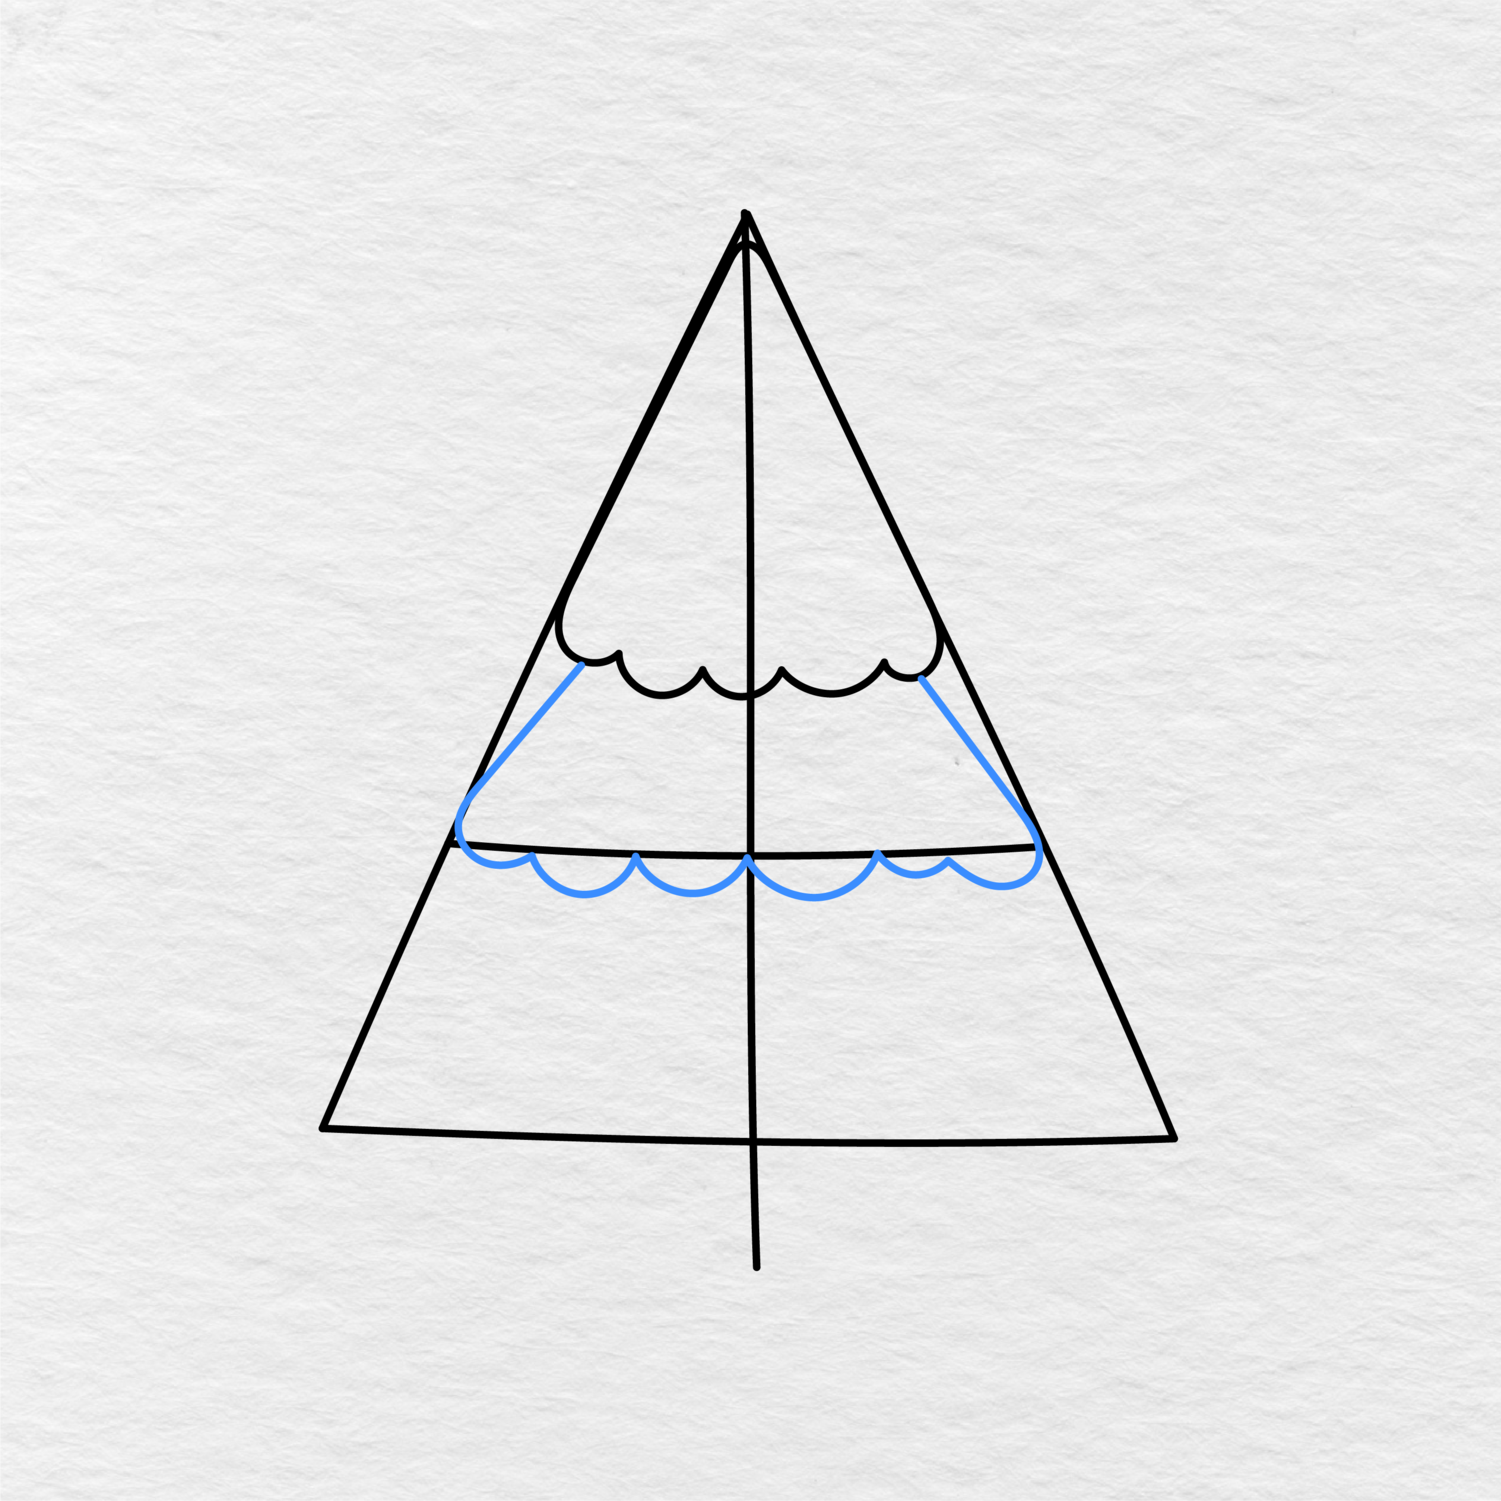
Now add the middle tree layer by following the middle guide lines. The middle layer should be wider than the top layer and have another row of small rounded curves at the bottom.
The middle tree layer should also overlap the guide lines and leave enough space for the bottom tree layer.
Step 4: Draw the Bottom Tree Layer
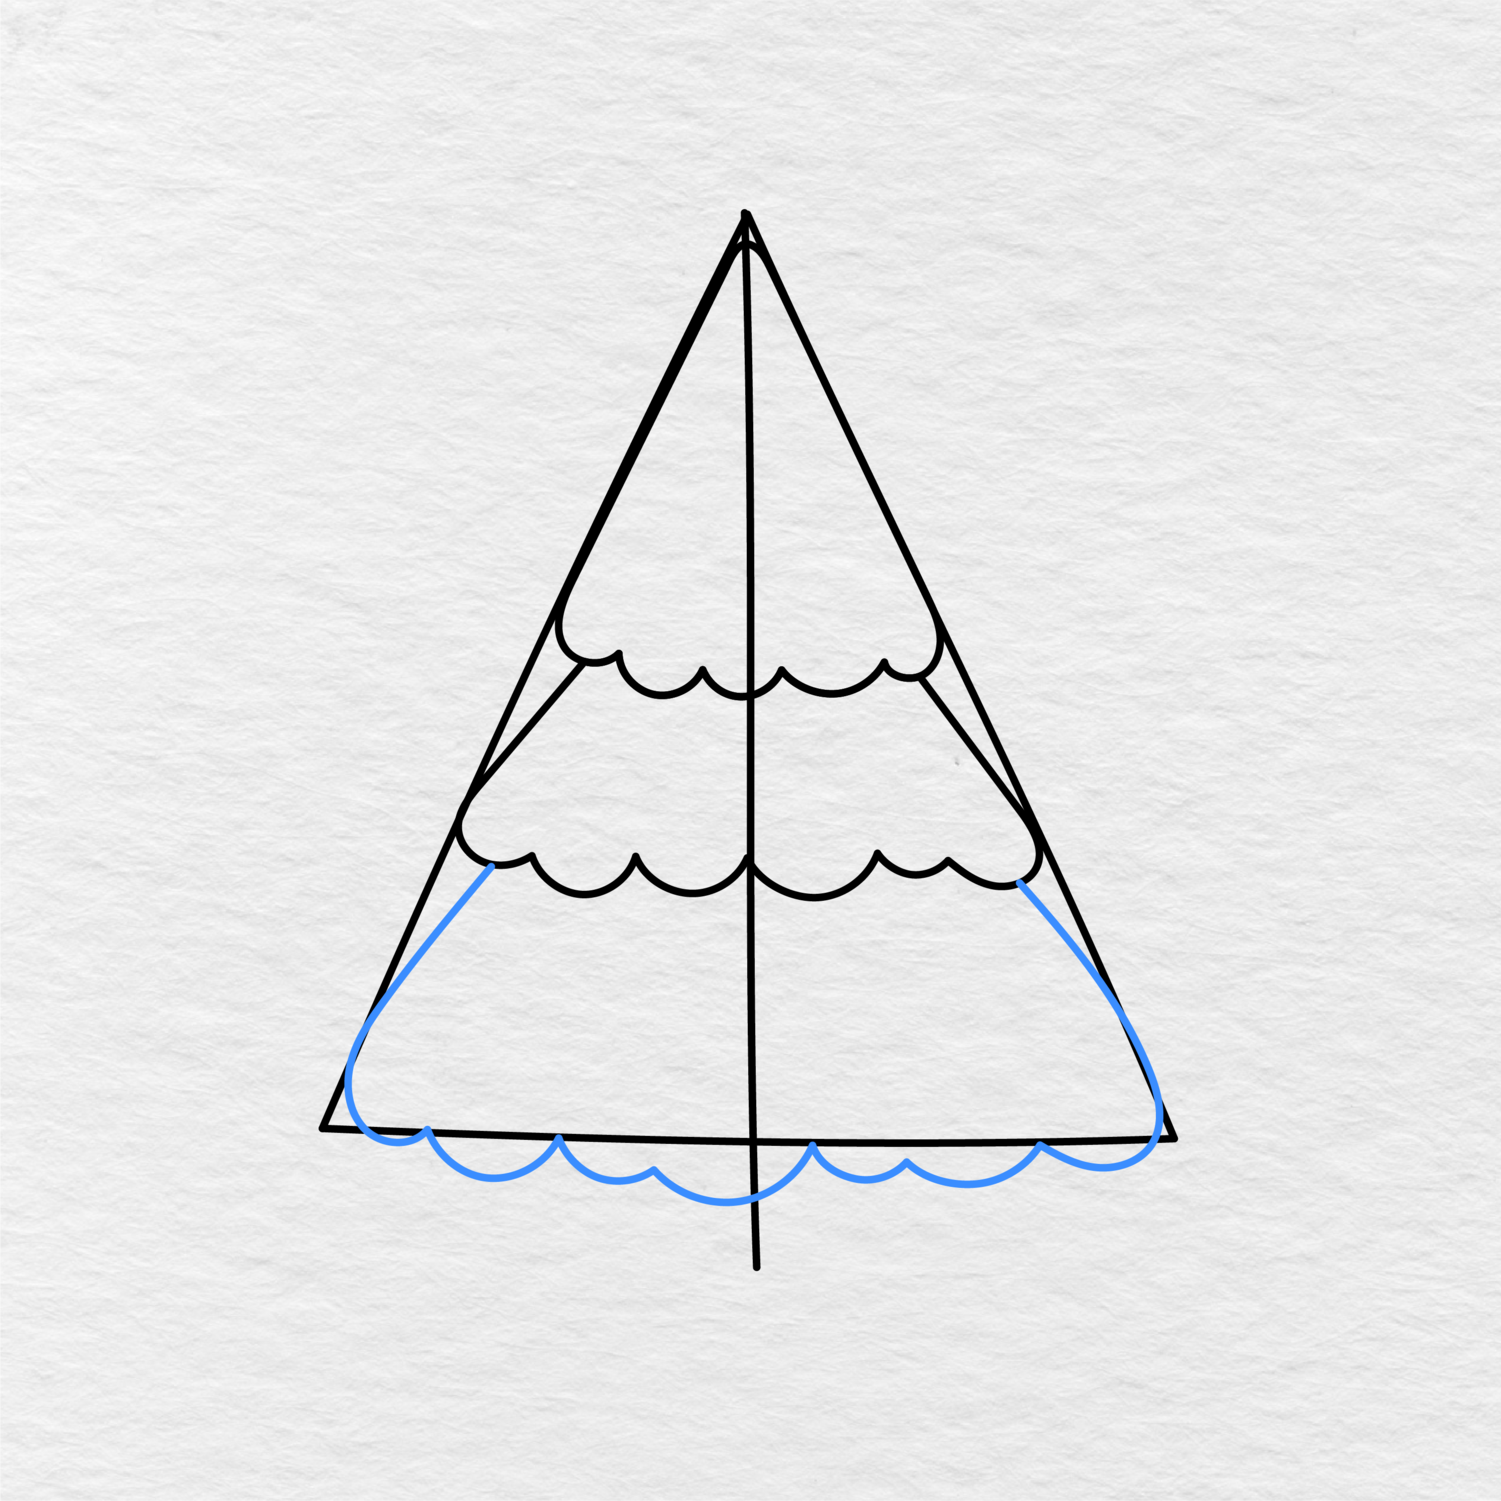
The final tree layer should be the widest one and overlap the guide lines at the bottom of the guide shape. Add some rounded curves to the bottom of the layer to achieve the tree shape.
After you have added the bottom tree layer, the sketch of the Christmas tree without ornaments, star, and trunk is ready.
Step 5: Add the Star
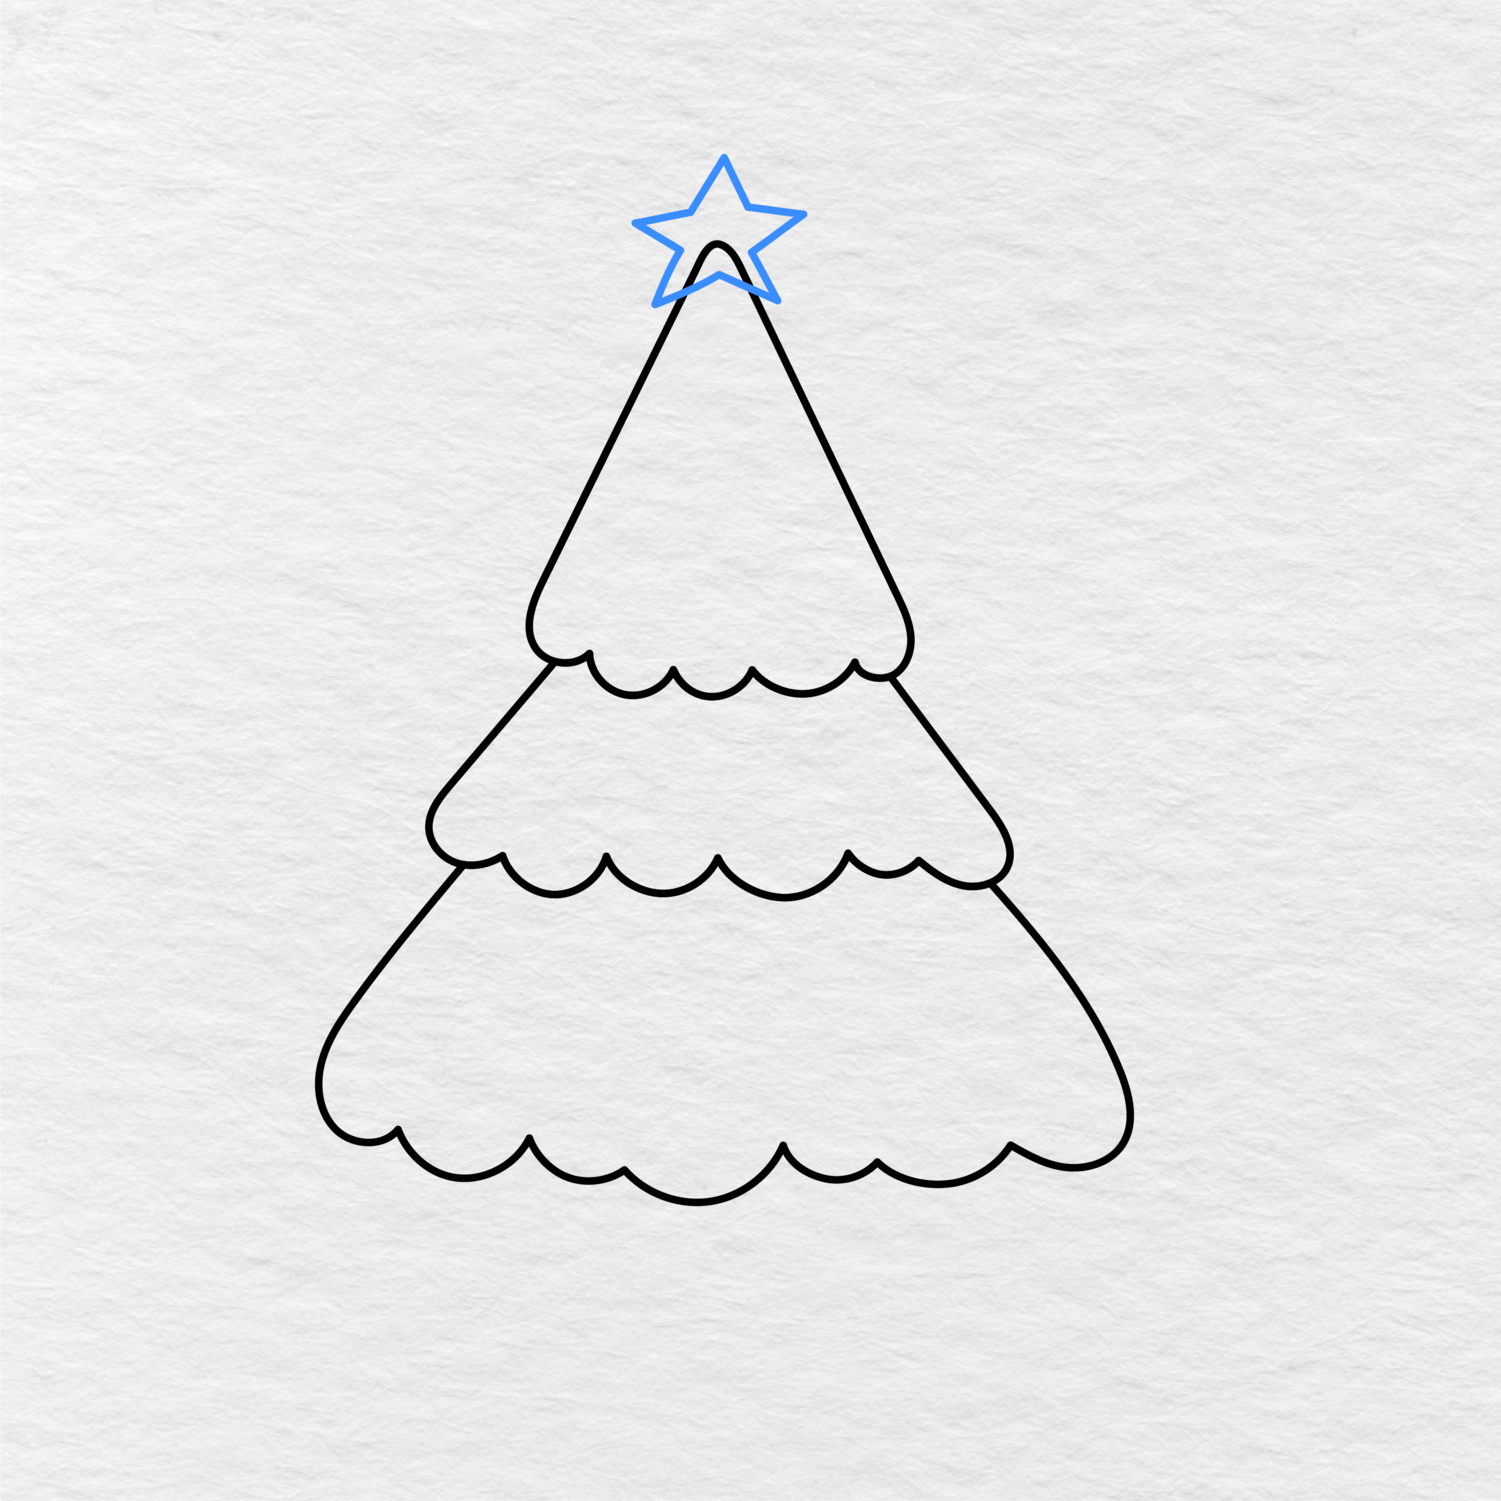
Next, add a five pointed star at the top of the Christmas tree. Make sure the star overlaps the top of the tree at the very top of the guide line.
The star should also be centered on the vertical guide line to achieve the balanced composition of the Christmas tree.
Step 6: Draw the Tree Trunk
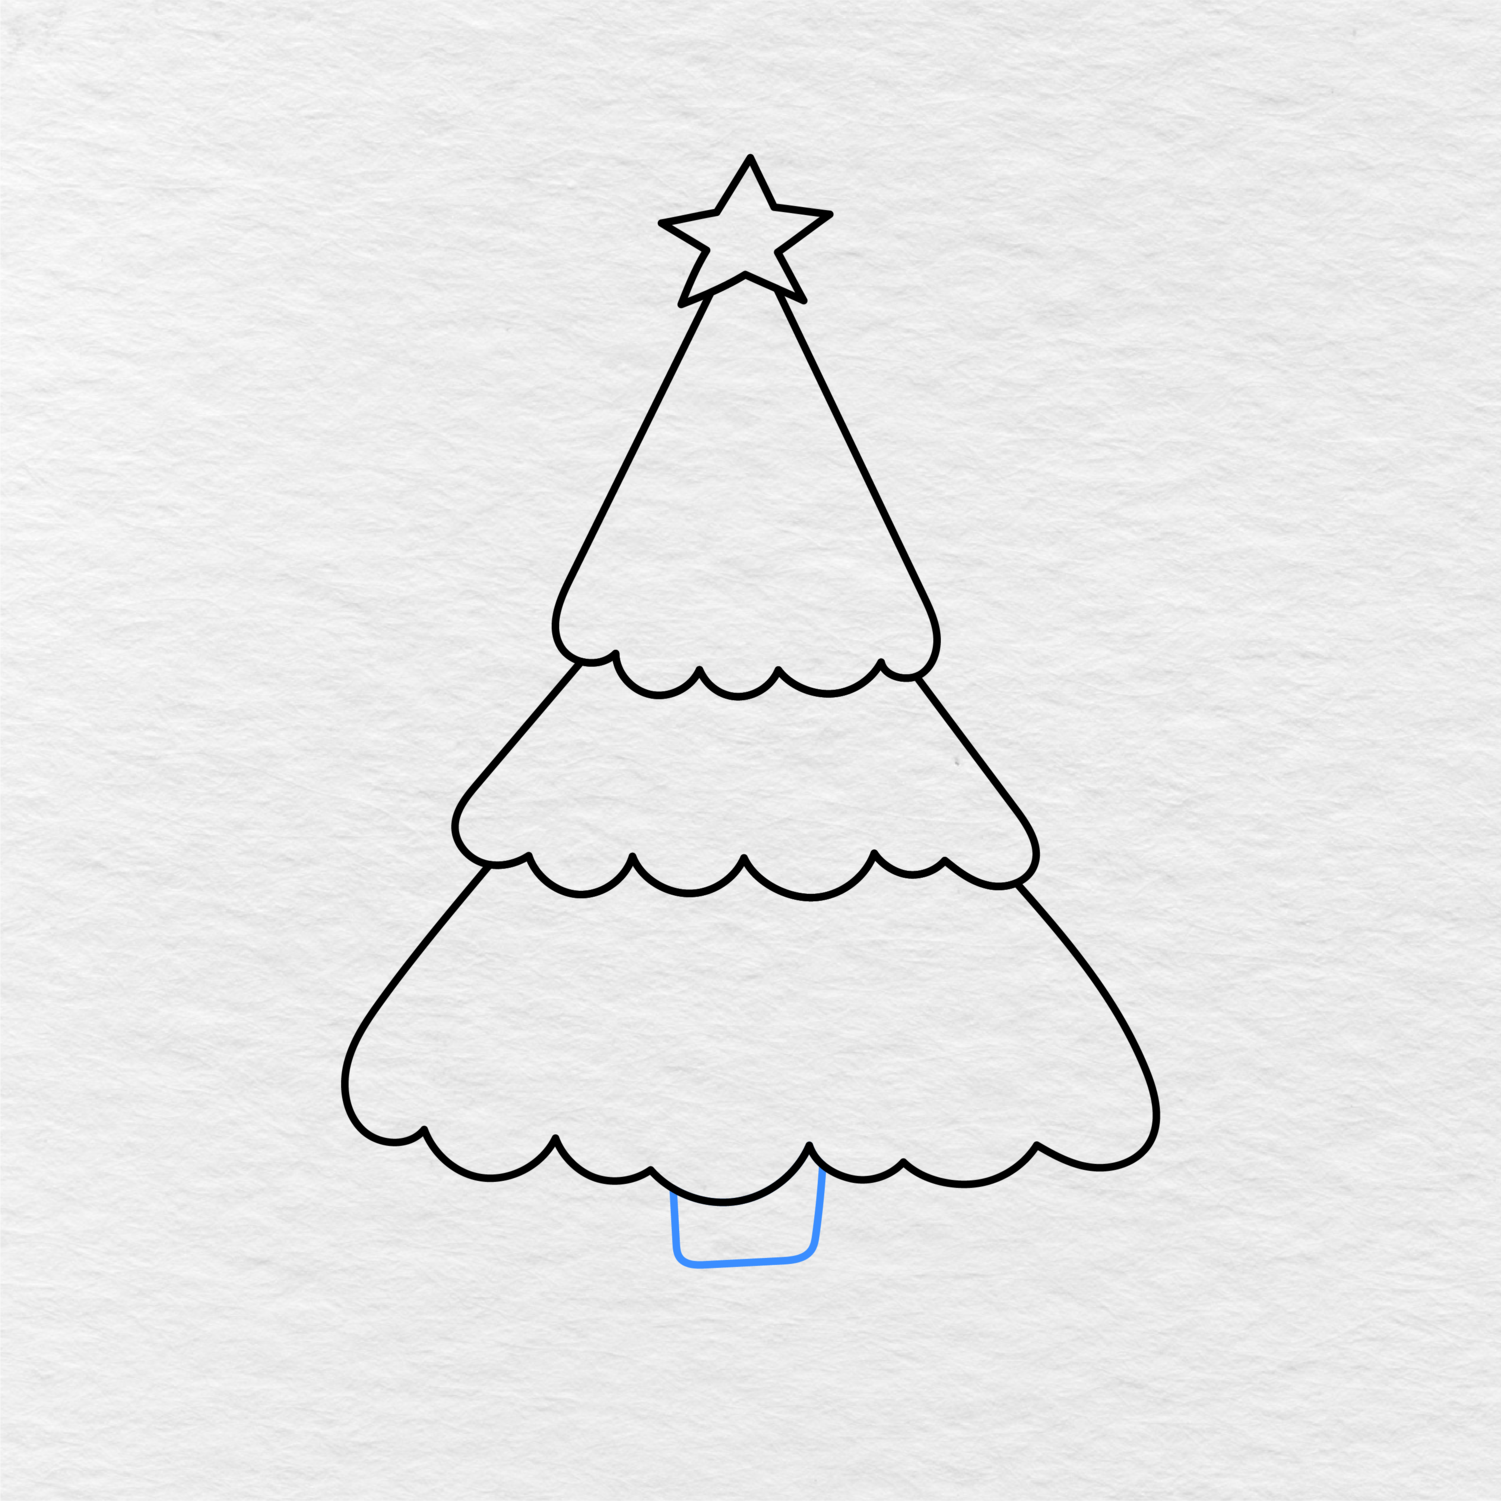
Continue the Christmas tree drawing by adding the tree trunk. Sketch a small rounded rectangle at the bottom of the tree and make sure part of it remains hidden behind the bottom tree layer.
The trunk should also be centered horizontally within the tree.
Step 7: Add the First Ornaments
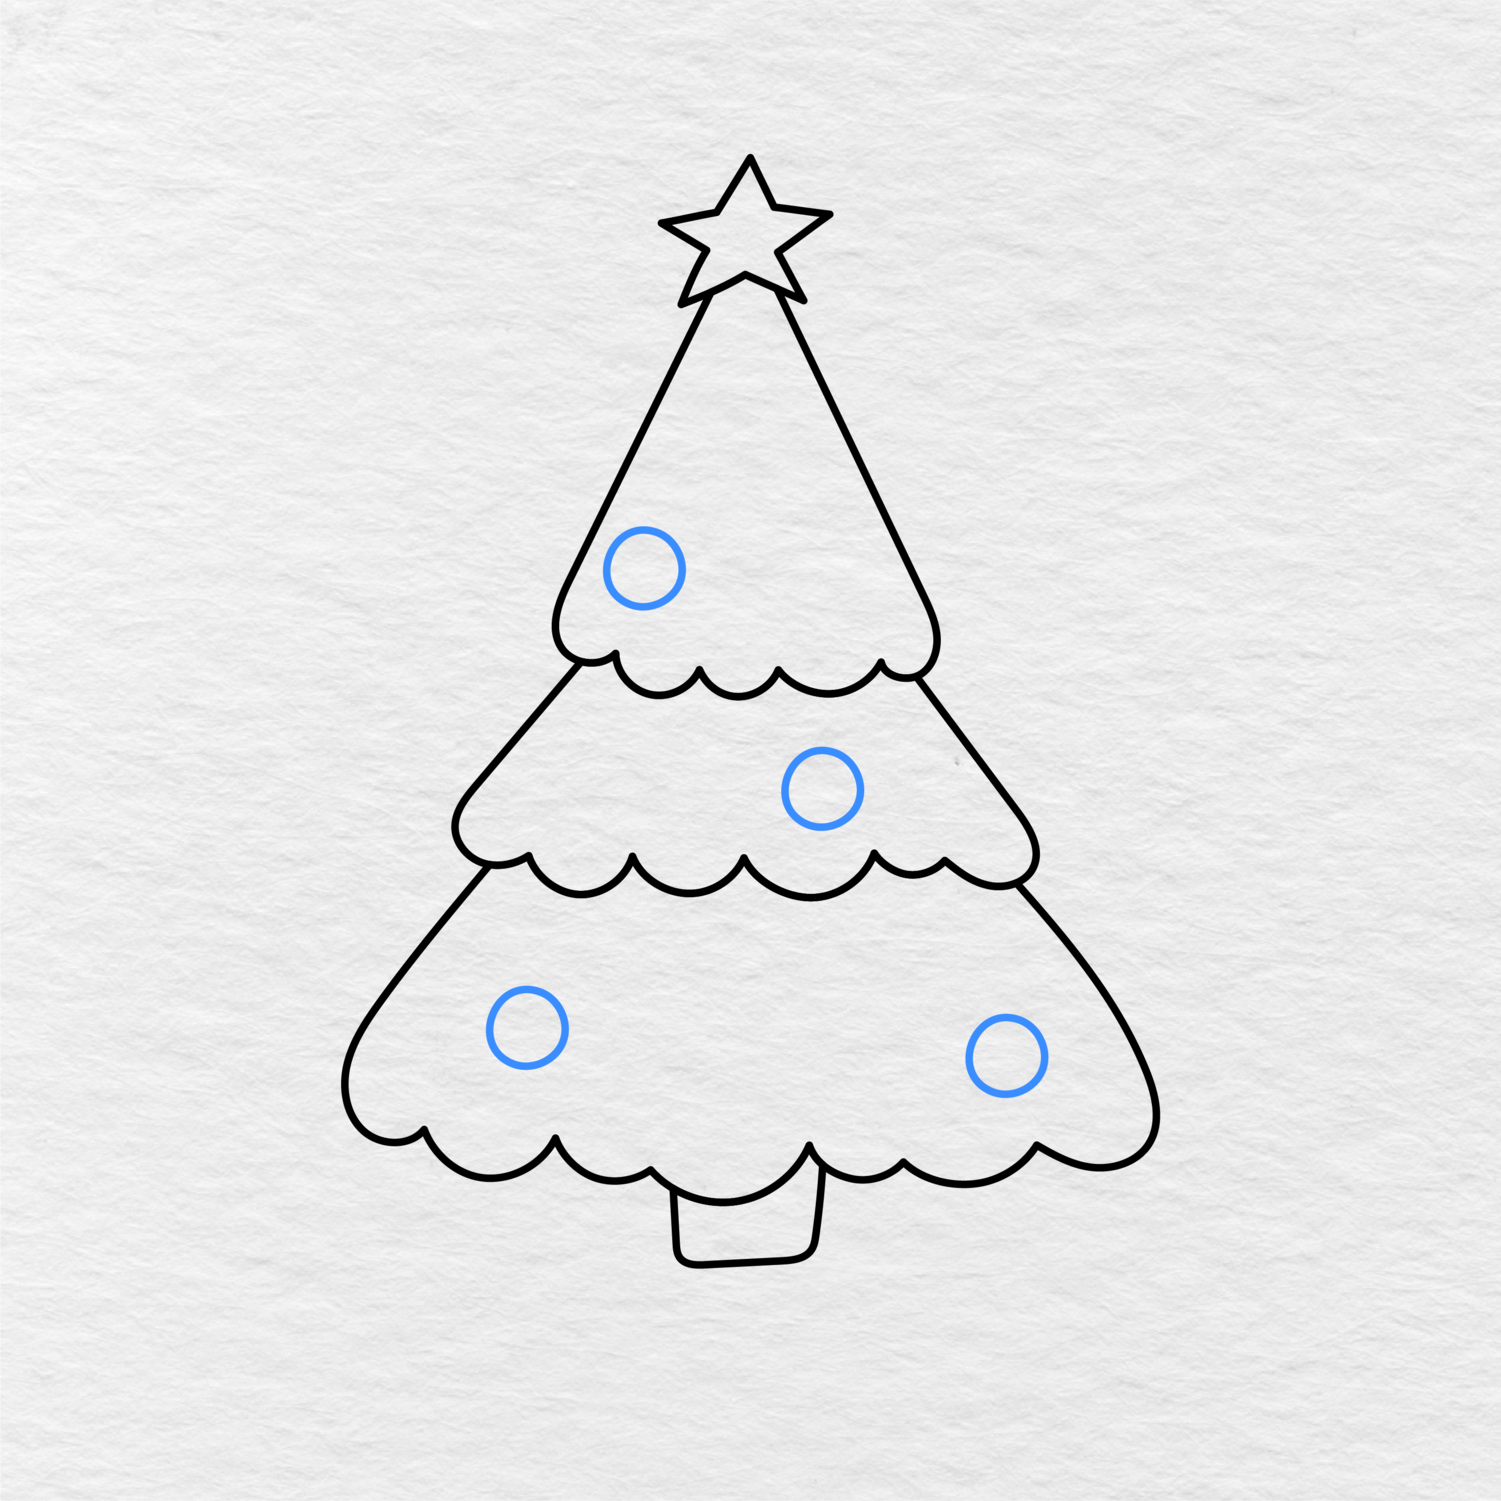
Now add the first set of ornaments by adding four circles of different sizes to the Christmas tree. One ornament should be added to the top tree layer, one to the middle tree layer, and two to the bottom tree layer.
The ornaments can be placed anywhere within the tree layers, but make sure they stay inside the tree outline.
Step 8: Draw the Remaining Ornaments
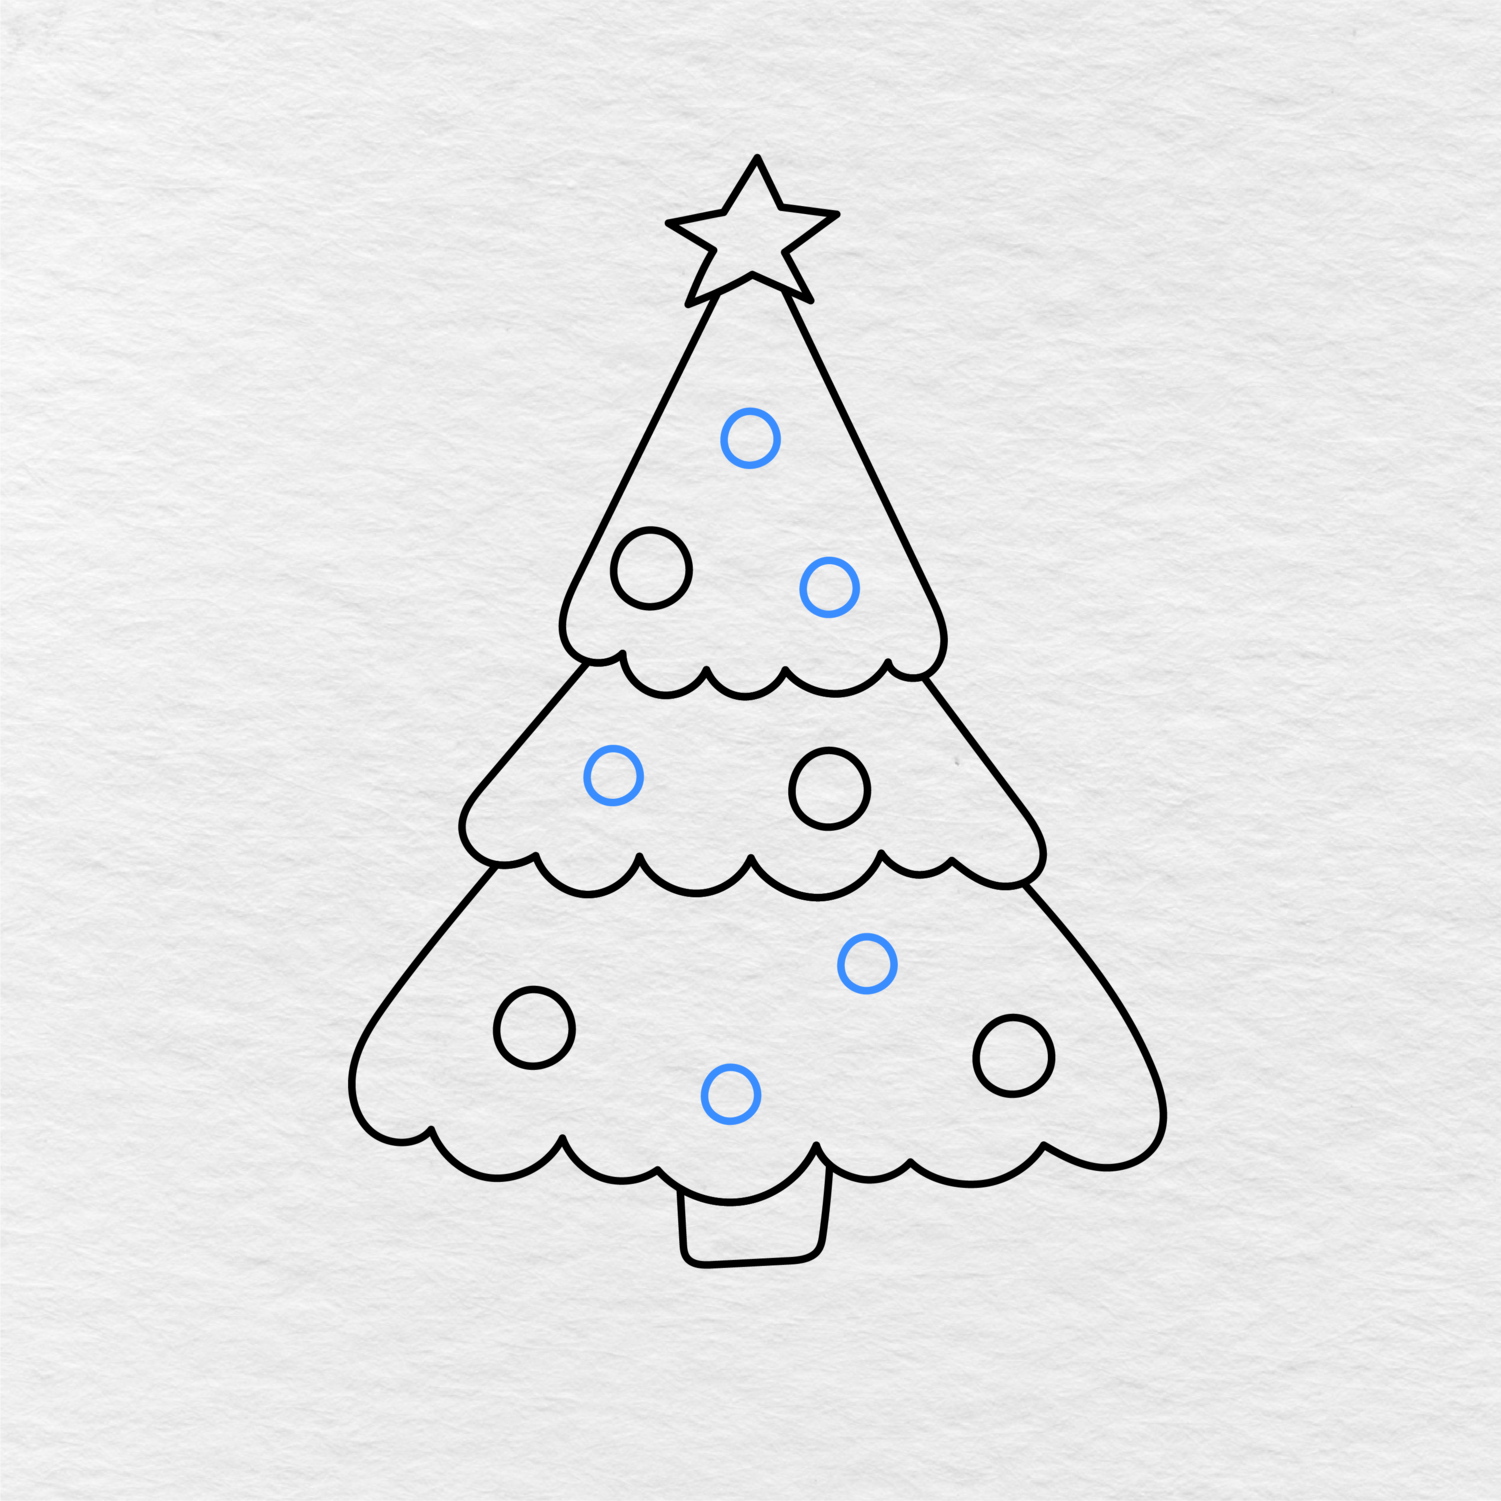
Add another five circles to the remaining spots around the Christmas tree. Finally, make sure there are nine ornaments in total on your tree.
They should also be spread across tree layers so that no two ornaments are placed too close to each other.
Step 9: Color the Christmas Tree
The last step is to color the Christmas tree drawing. You can use the final image below as a reference and draw inspiration from it when you color your tree.
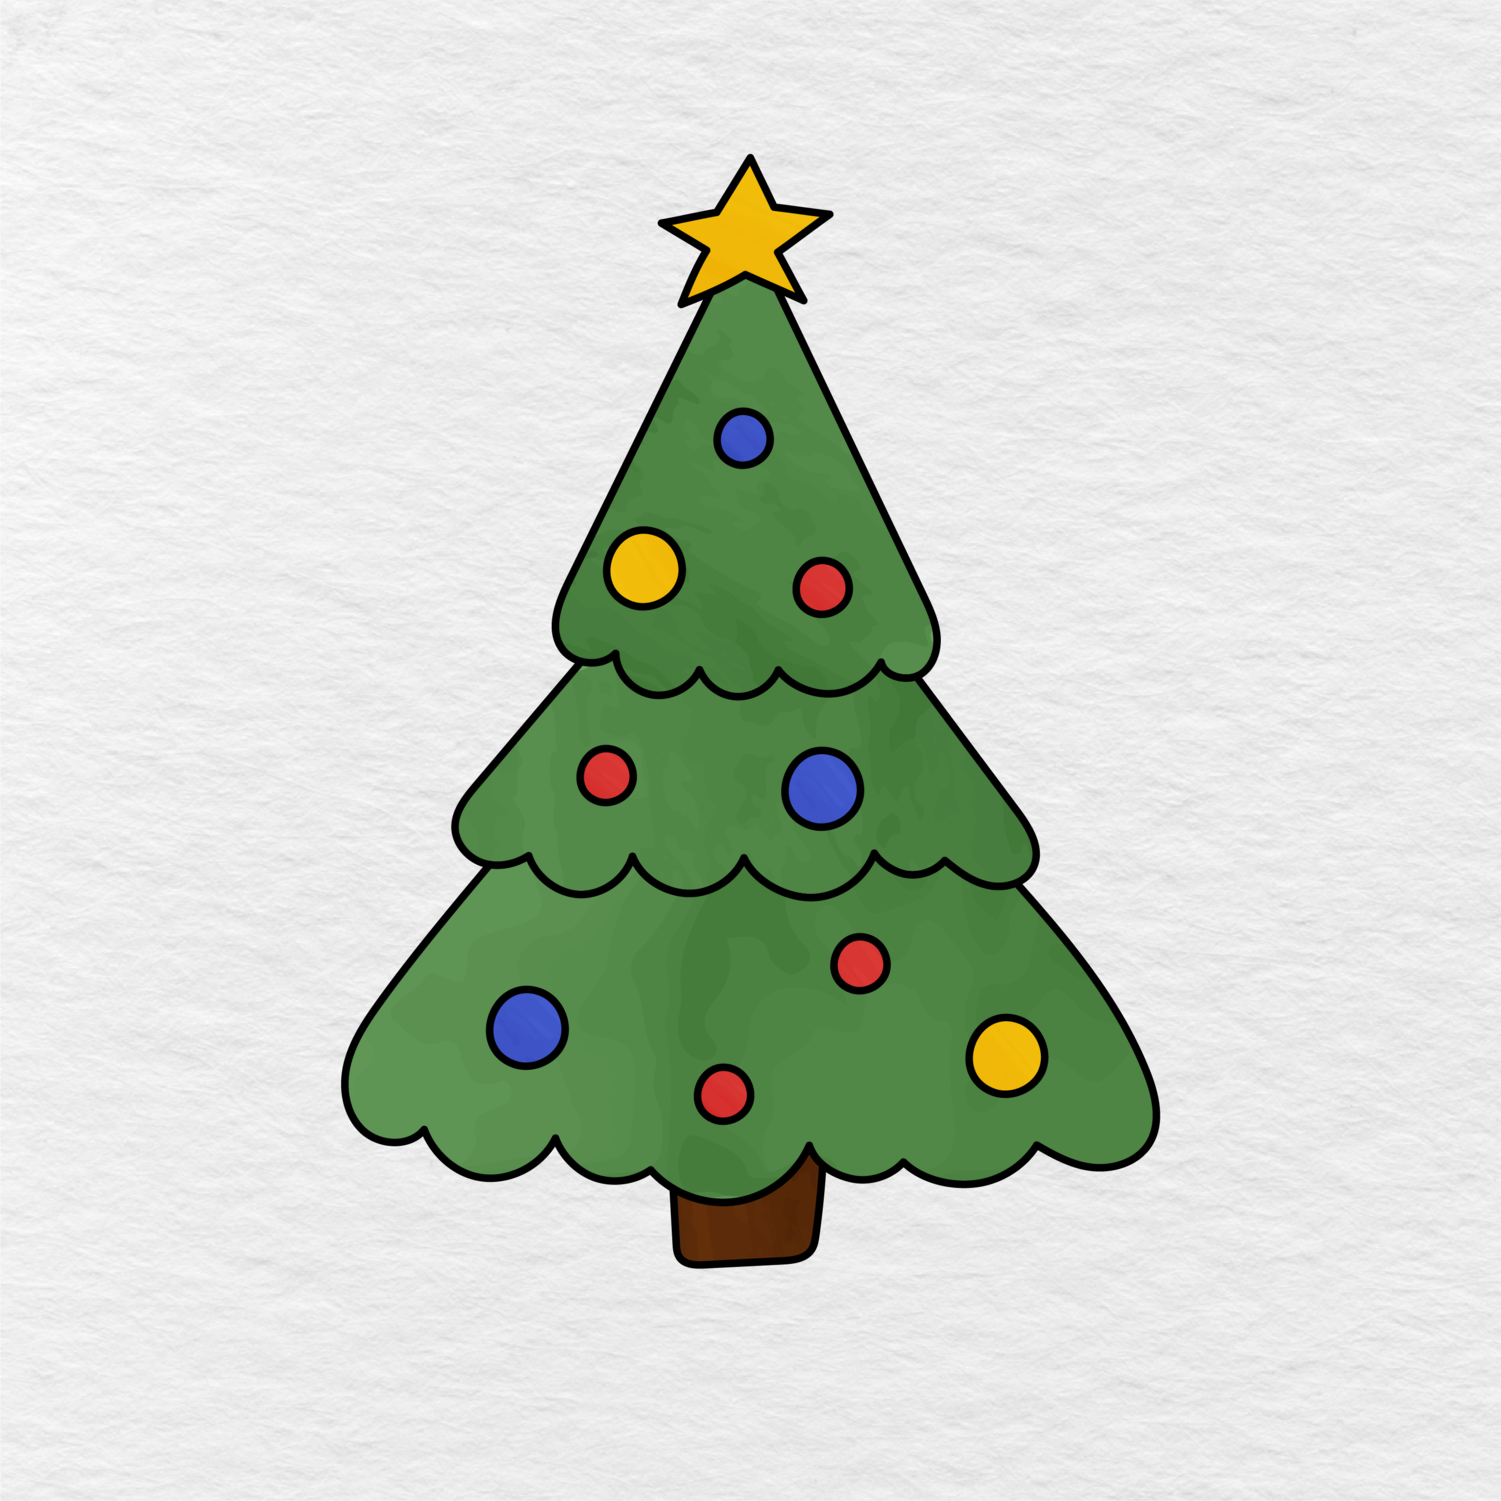
Make sure to use green colors for the tree, yellow for the star, brown for the trunk, and red, blue, and yellow for the ornaments. After you have finished, your Christmas tree drawing is complete.
Printable Christmas Tree Drawing PDF
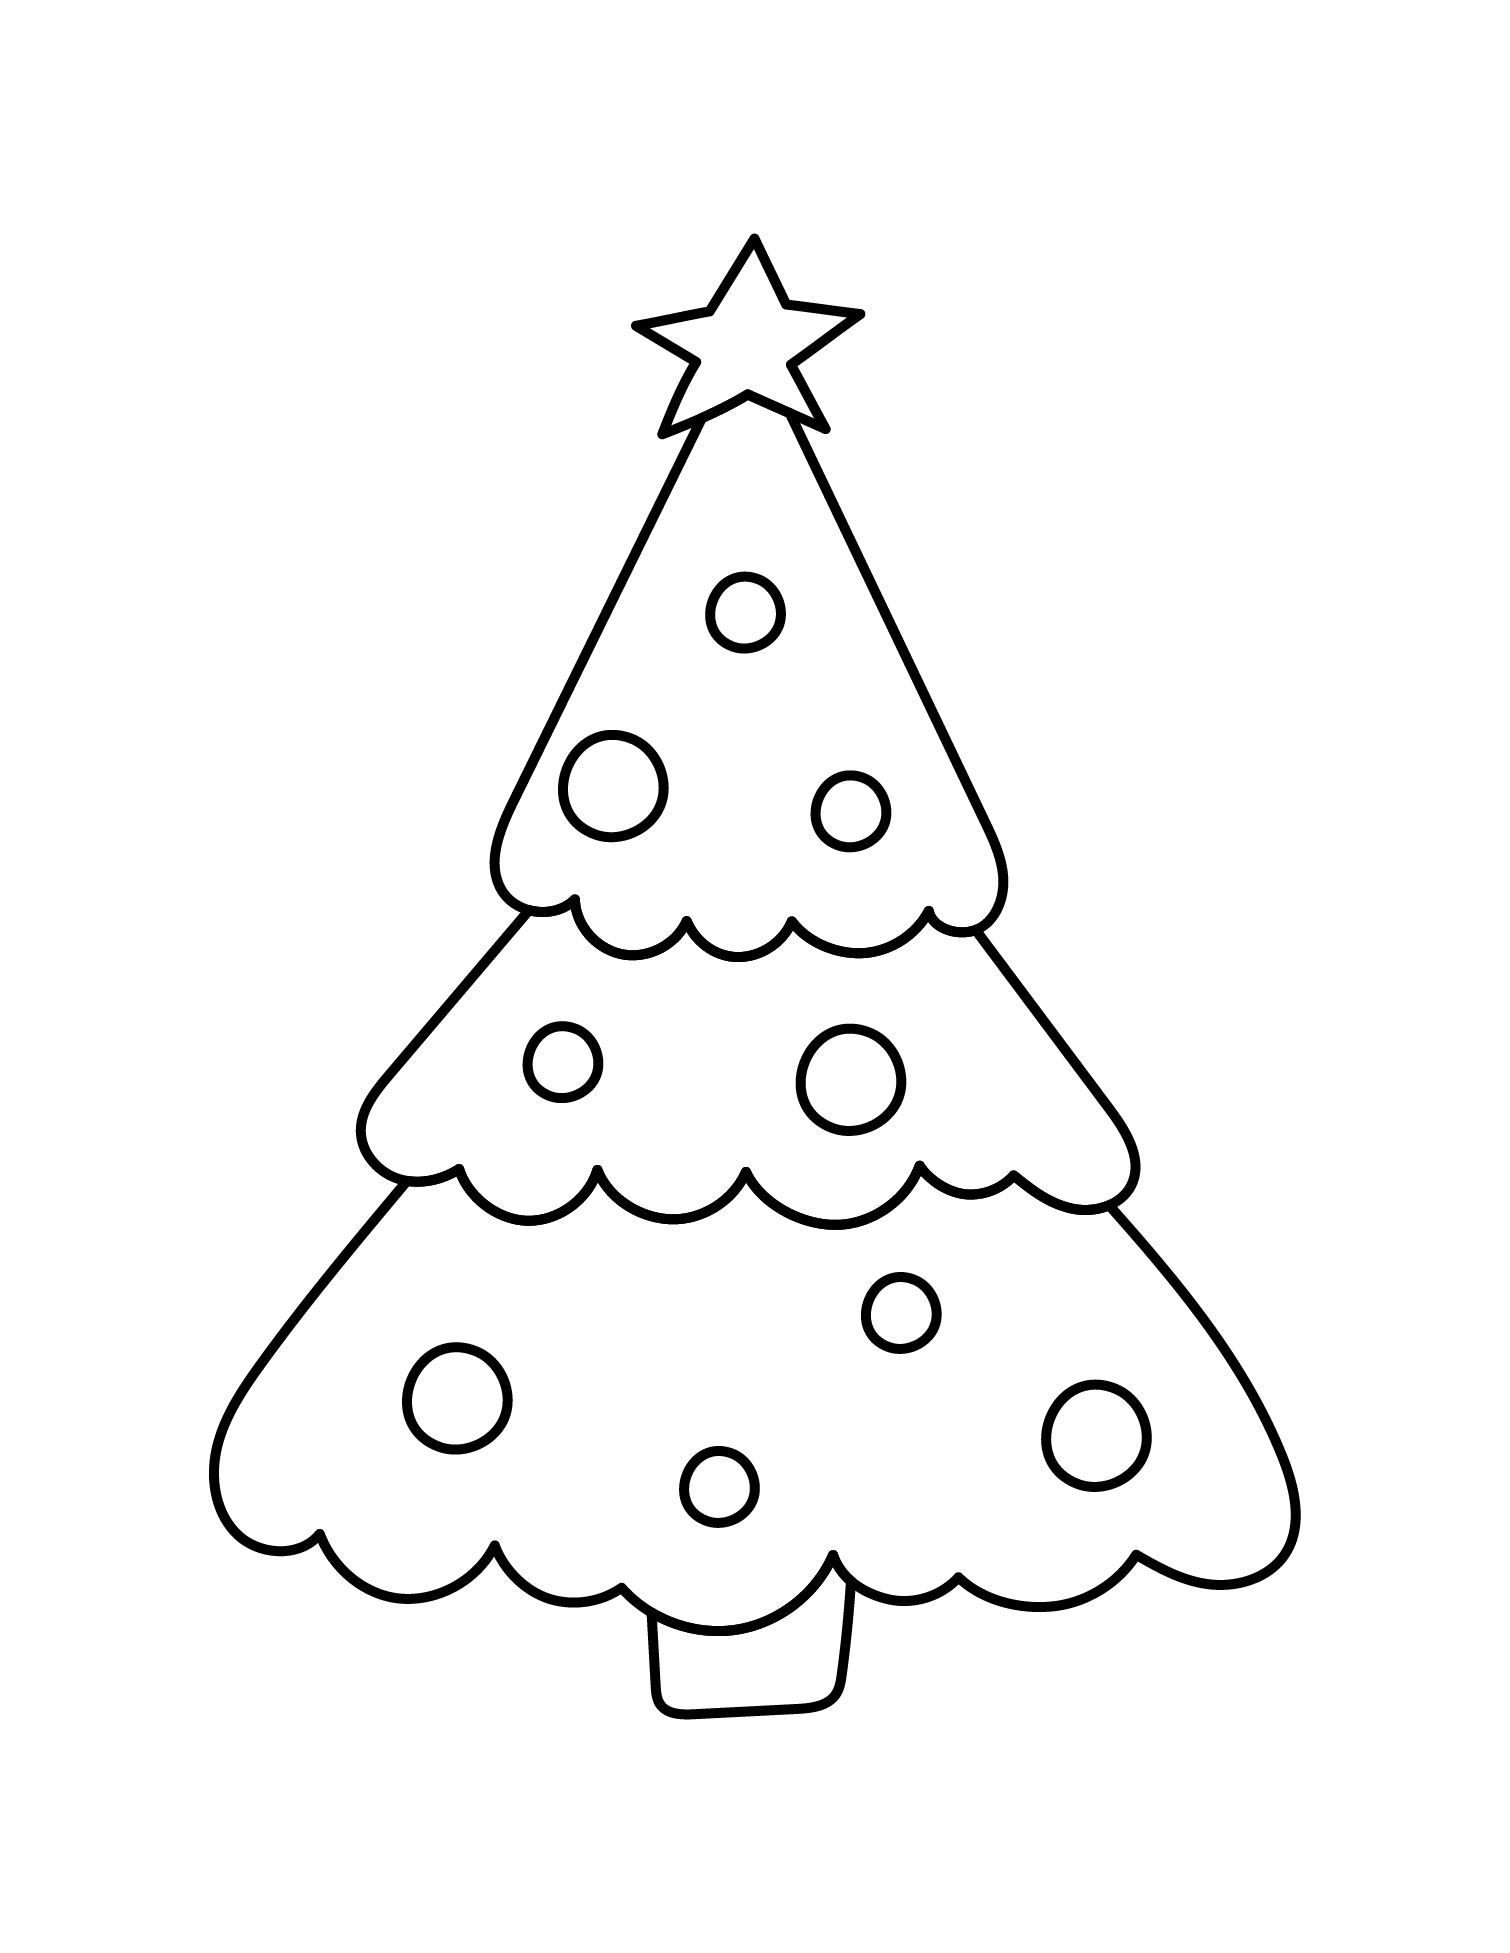
You can also download the image of the Christmas tree below as a PDF file and print it to use it as a coloring page.
The image below shows the final tree without any colors, so kids can print it and color it according to their own ideas and color preferences.
To find more printable coloring pages, go to the Christmas Coloring Pages collection on our website.
If you like this Christmas tree drawing guide and want us to create more pages like this, make sure to let us know in the comments below. It would also mean a lot to us if you could share this page with another parent, teacher, or friend.