How to Draw a Soccer Ball
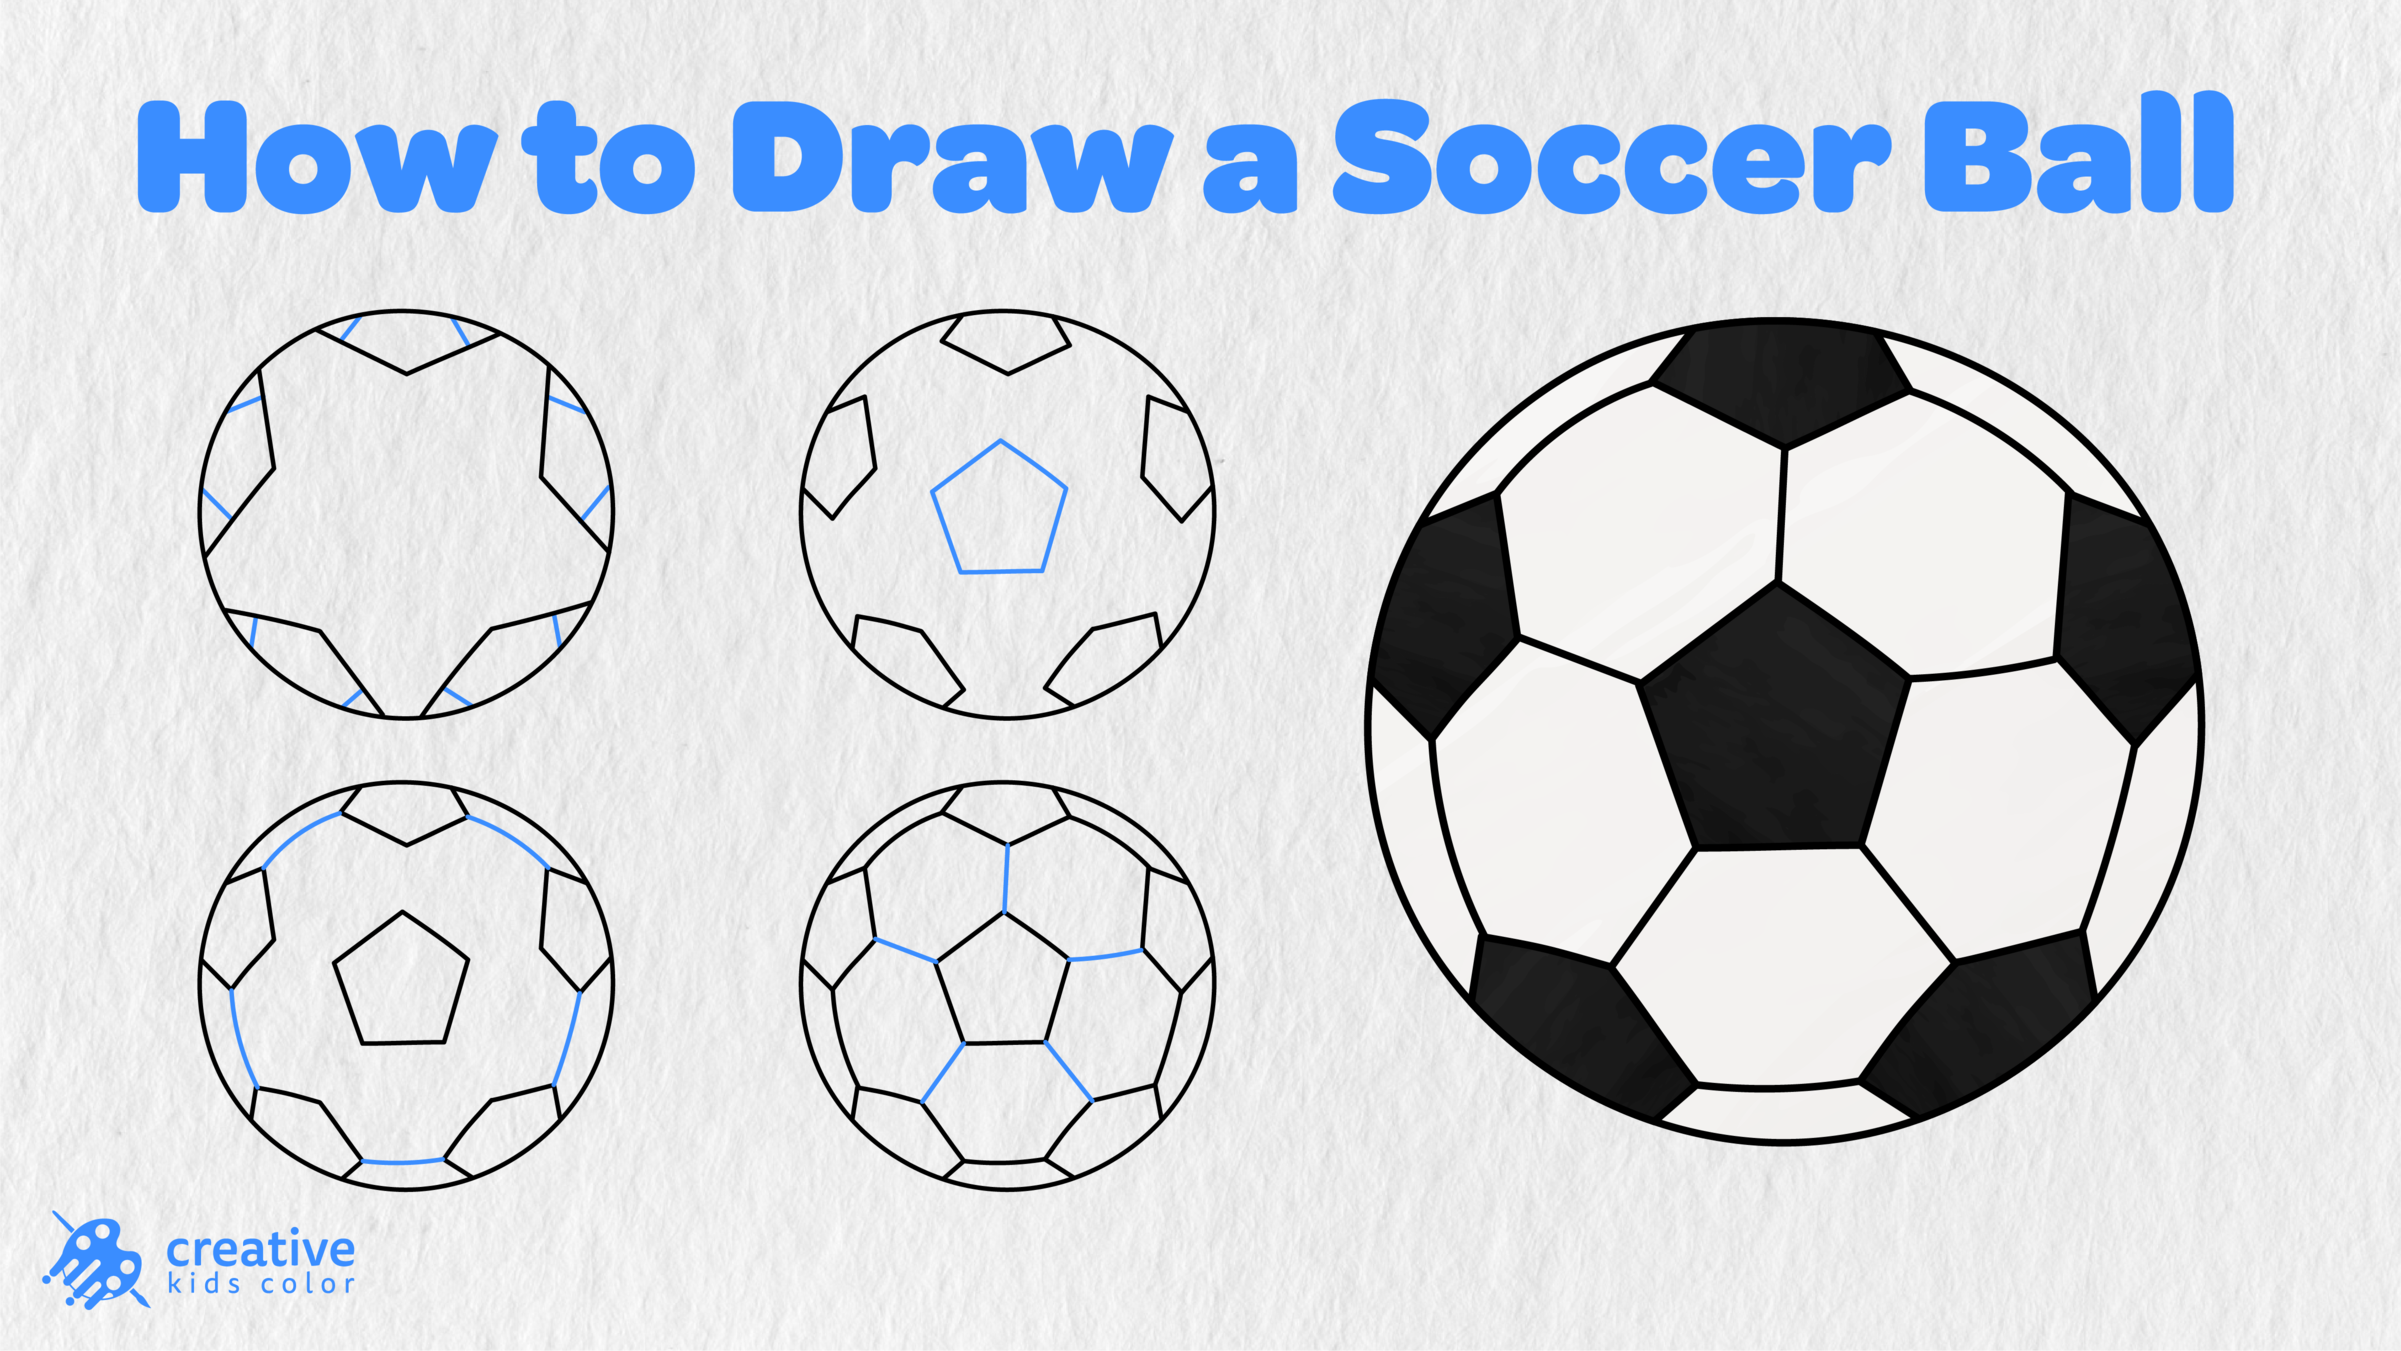
Learning how to draw a soccer ball is not as easy as it seems, as the popular black and white pattern has to be somehow placed in a circle. This tutorial will help you create a soccer ball step by step, starting with the circle, then the patterns on the ball, and finally the colors.
Kids can easily follow the steps shown in pictures and complete their own soccer ball drawing without calculating each angle and line as the majority of the pattern will be drawn step by step. It is better to draw light lines so that they can be erased and redrawn if some of the lines are not in the right spot.
In addition to the circle, most of the process consists of patterns. After you have added the first five outer panels and a center pentagon, the rest of the lines will be easier to add. While the final result might look like a real soccer ball ready for a match, this one will stay on the page.
Easy Soccer Ball Drawing Step by Step
Before you start, grab a pencil, paper, eraser, and something to color. The blue lines in the pictures below represent the new lines you have to add at each step, so it should be easier to follow the tutorial.
Step 1: Draw the Soccer Ball Circle

The first step is to draw a large circle in the middle of the page. This line will represent the outline of the soccer ball, so make sure to leave some space around the circle.
The circle does not have to be perfect as it can be redrawn later. In addition, you can use some round object as a guide if you want the circle to be more accurate.
Step 2: Add the First Panel Lines
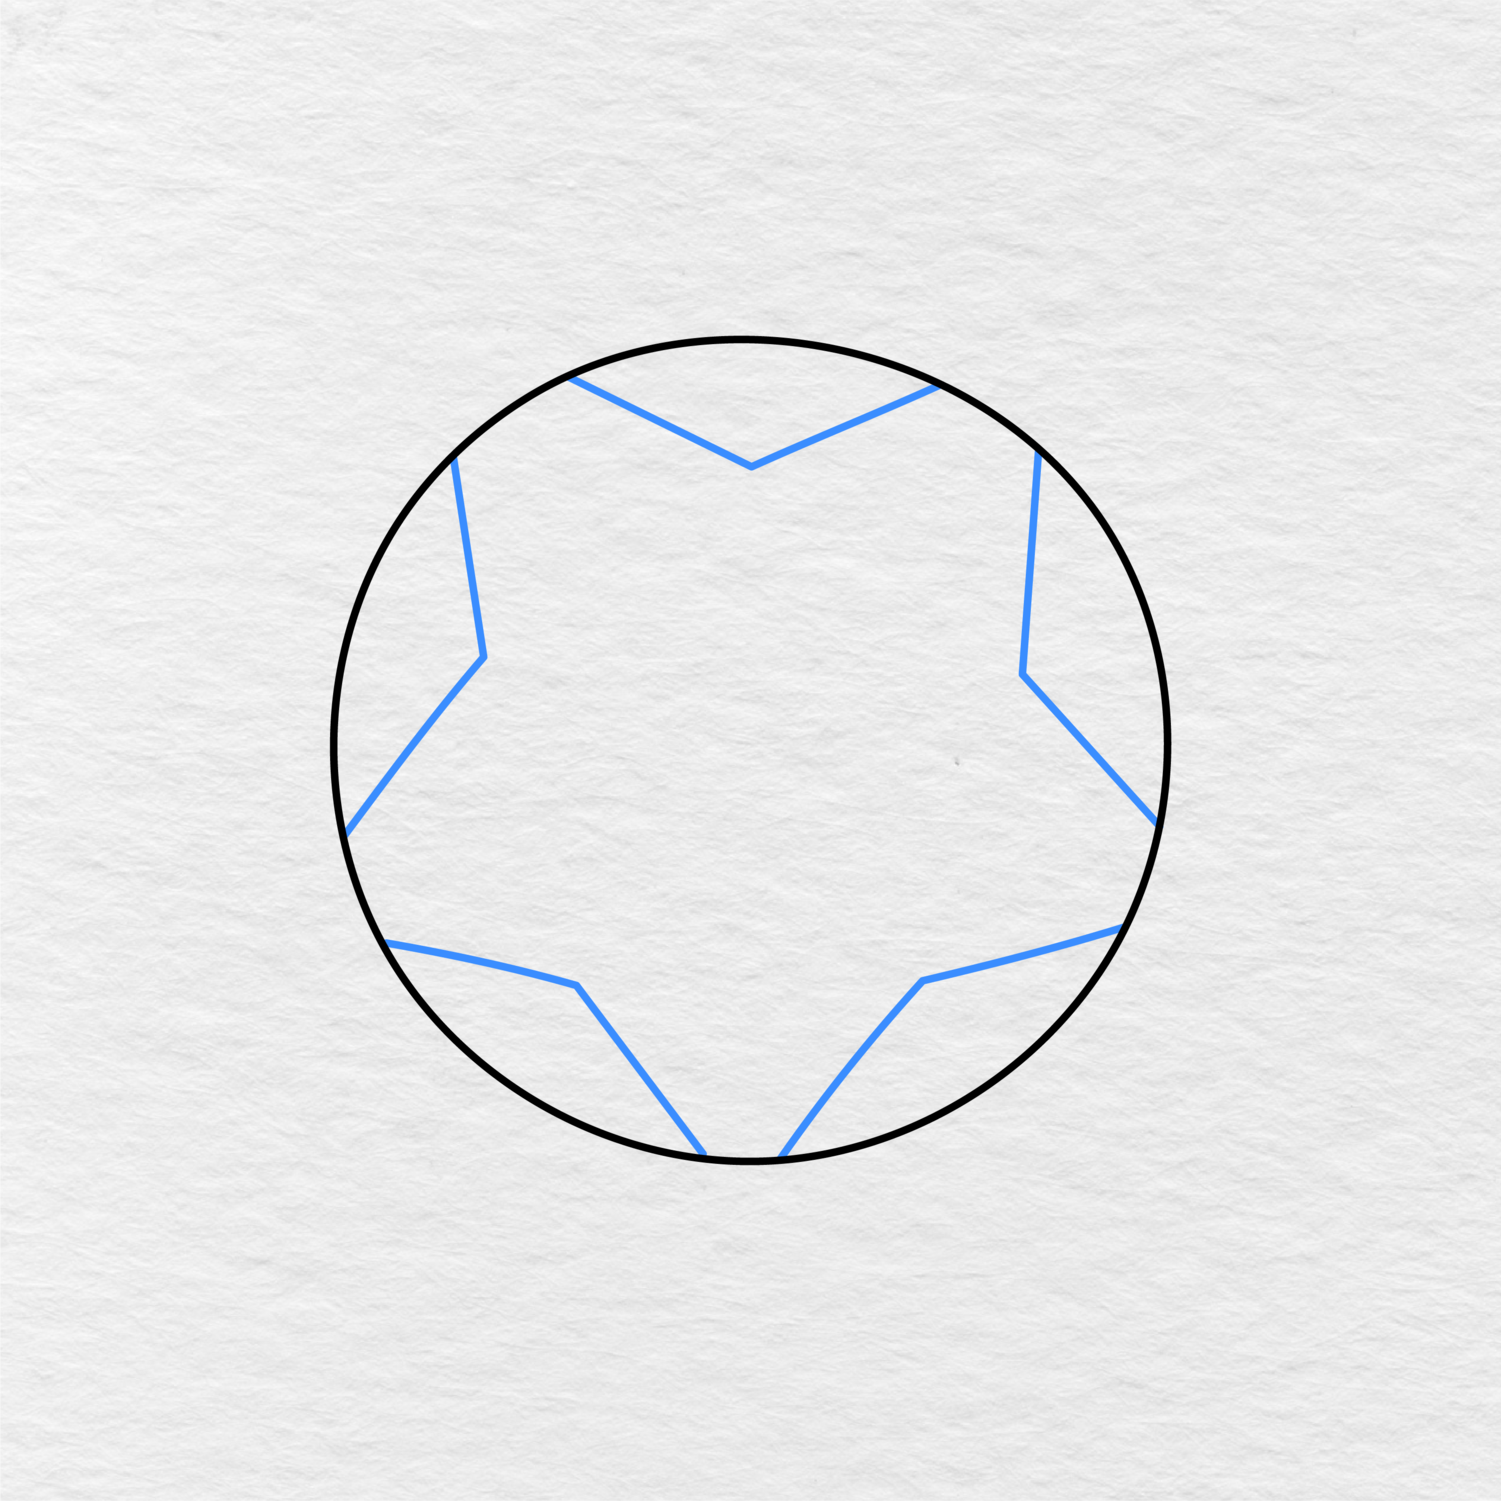
Add five wide angled lines around the inside of the circle. Each line has to go inward pointing to the center while leaving a large space in the middle of the circle.
Make sure to space them out so that the circle has about the same amount of space between each line. These lines will become the first five outer panels of the soccer ball, which you will complete in the next step.
Step 3: Complete the Outer Panels
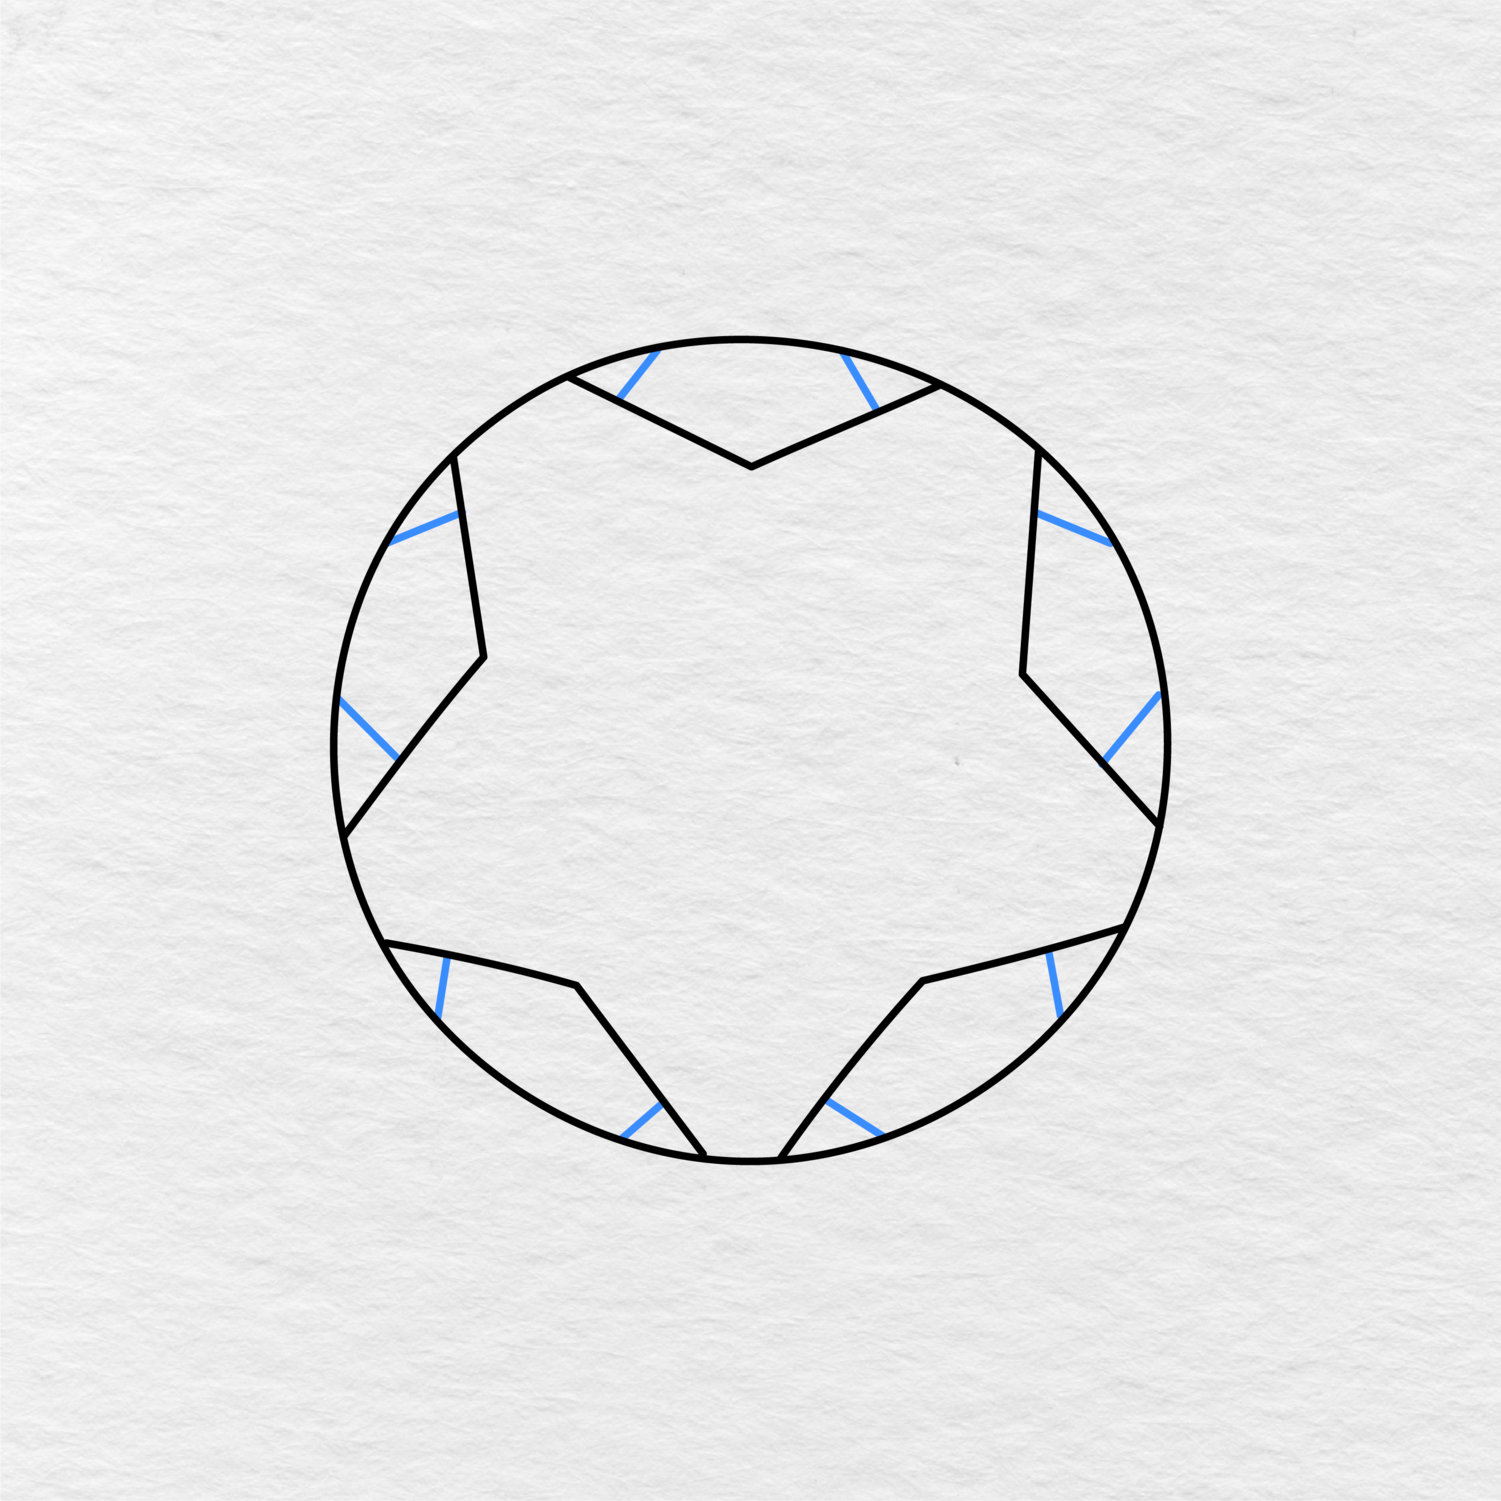
Add short lines near the outside edge of the circle to complete the five outer panels of the soccer ball. Follow the curve of the ball and add them one at a time until you reach the end.
After you have added the lines, you should see five panels around the outside of the soccer ball.
Step 4: Draw the Center Pentagon
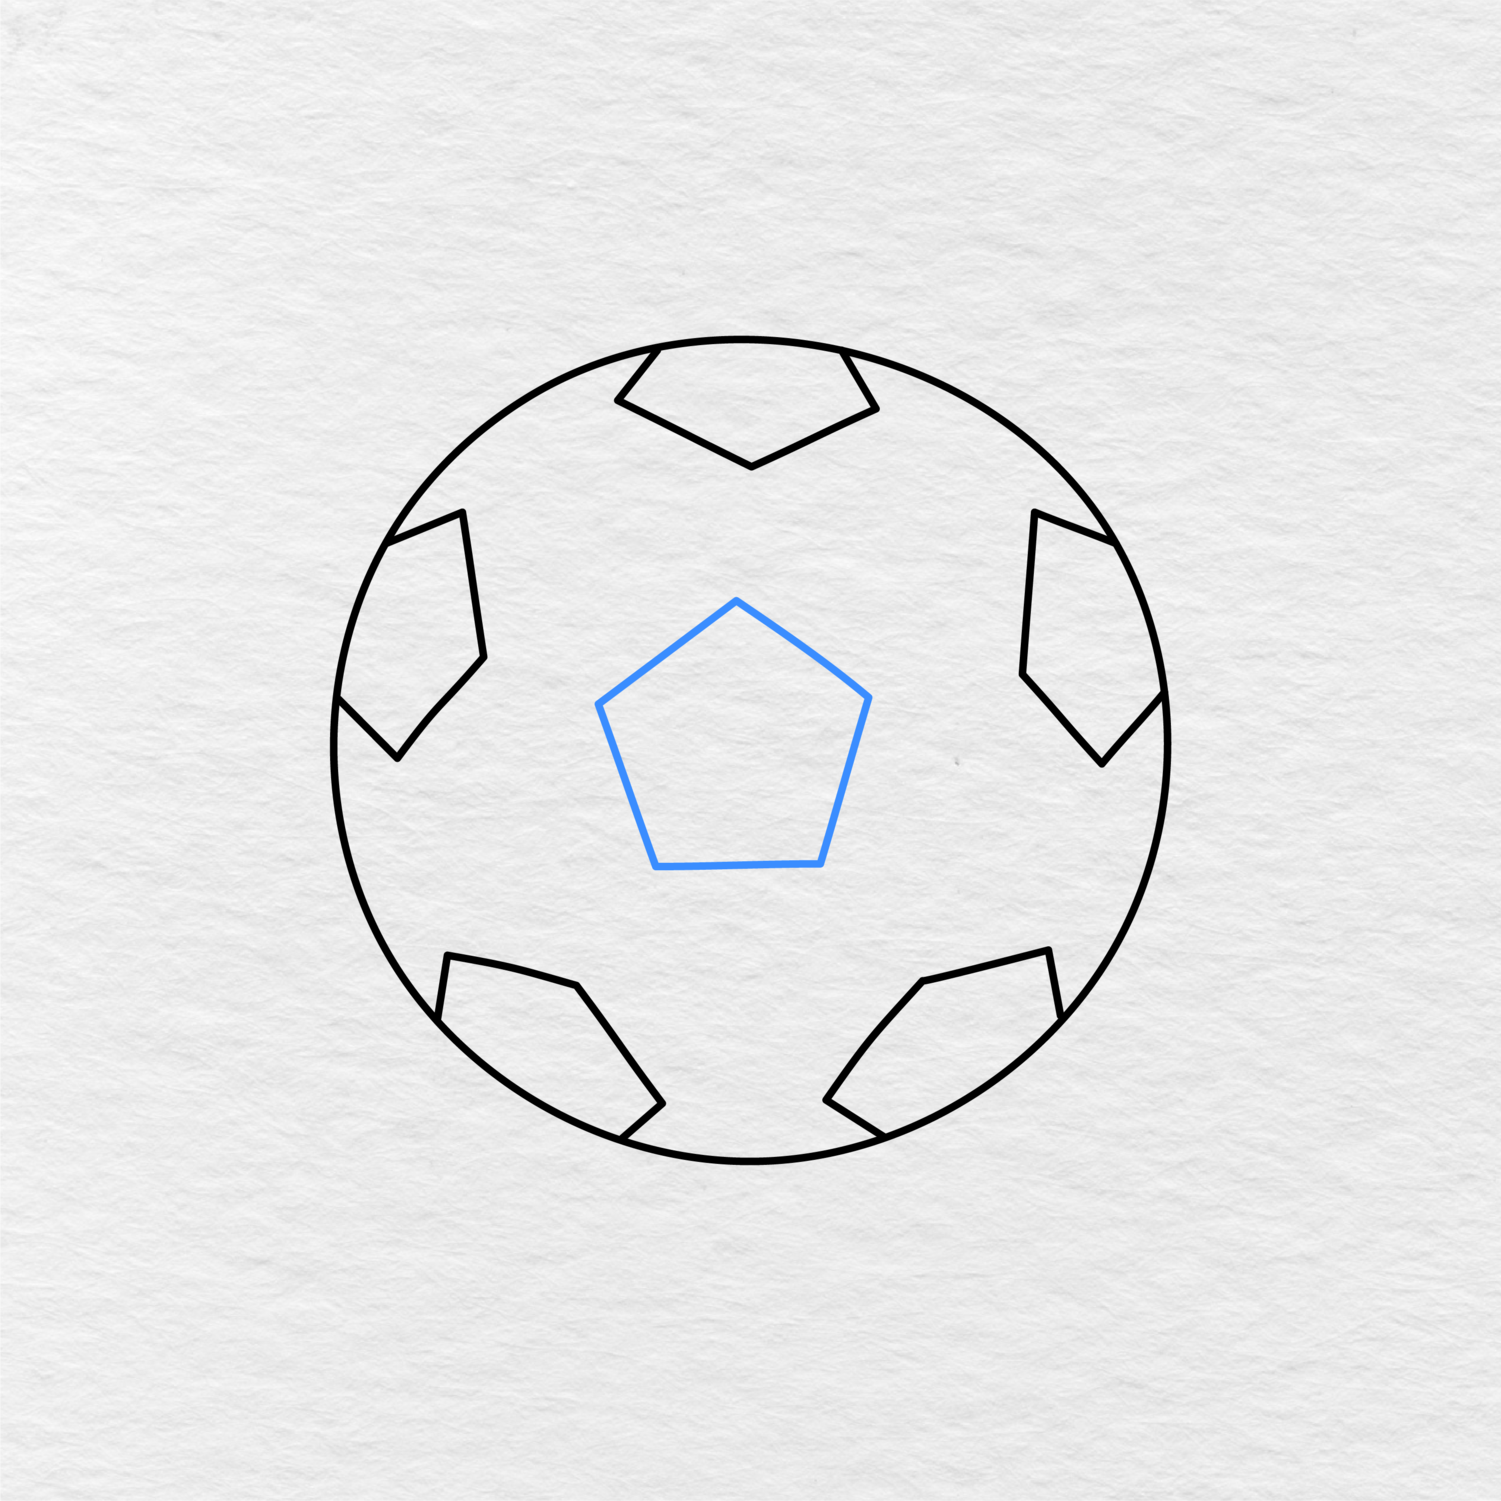
Draw a five sided shape in the middle of the ball. Make sure to keep the figure close to the center of the ball while leaving enough space between the outer panels and the center pentagon.
The shape does not have to be perfect, but it has to have five clearly defined sides.
Step 5: Connect the Outer Panels
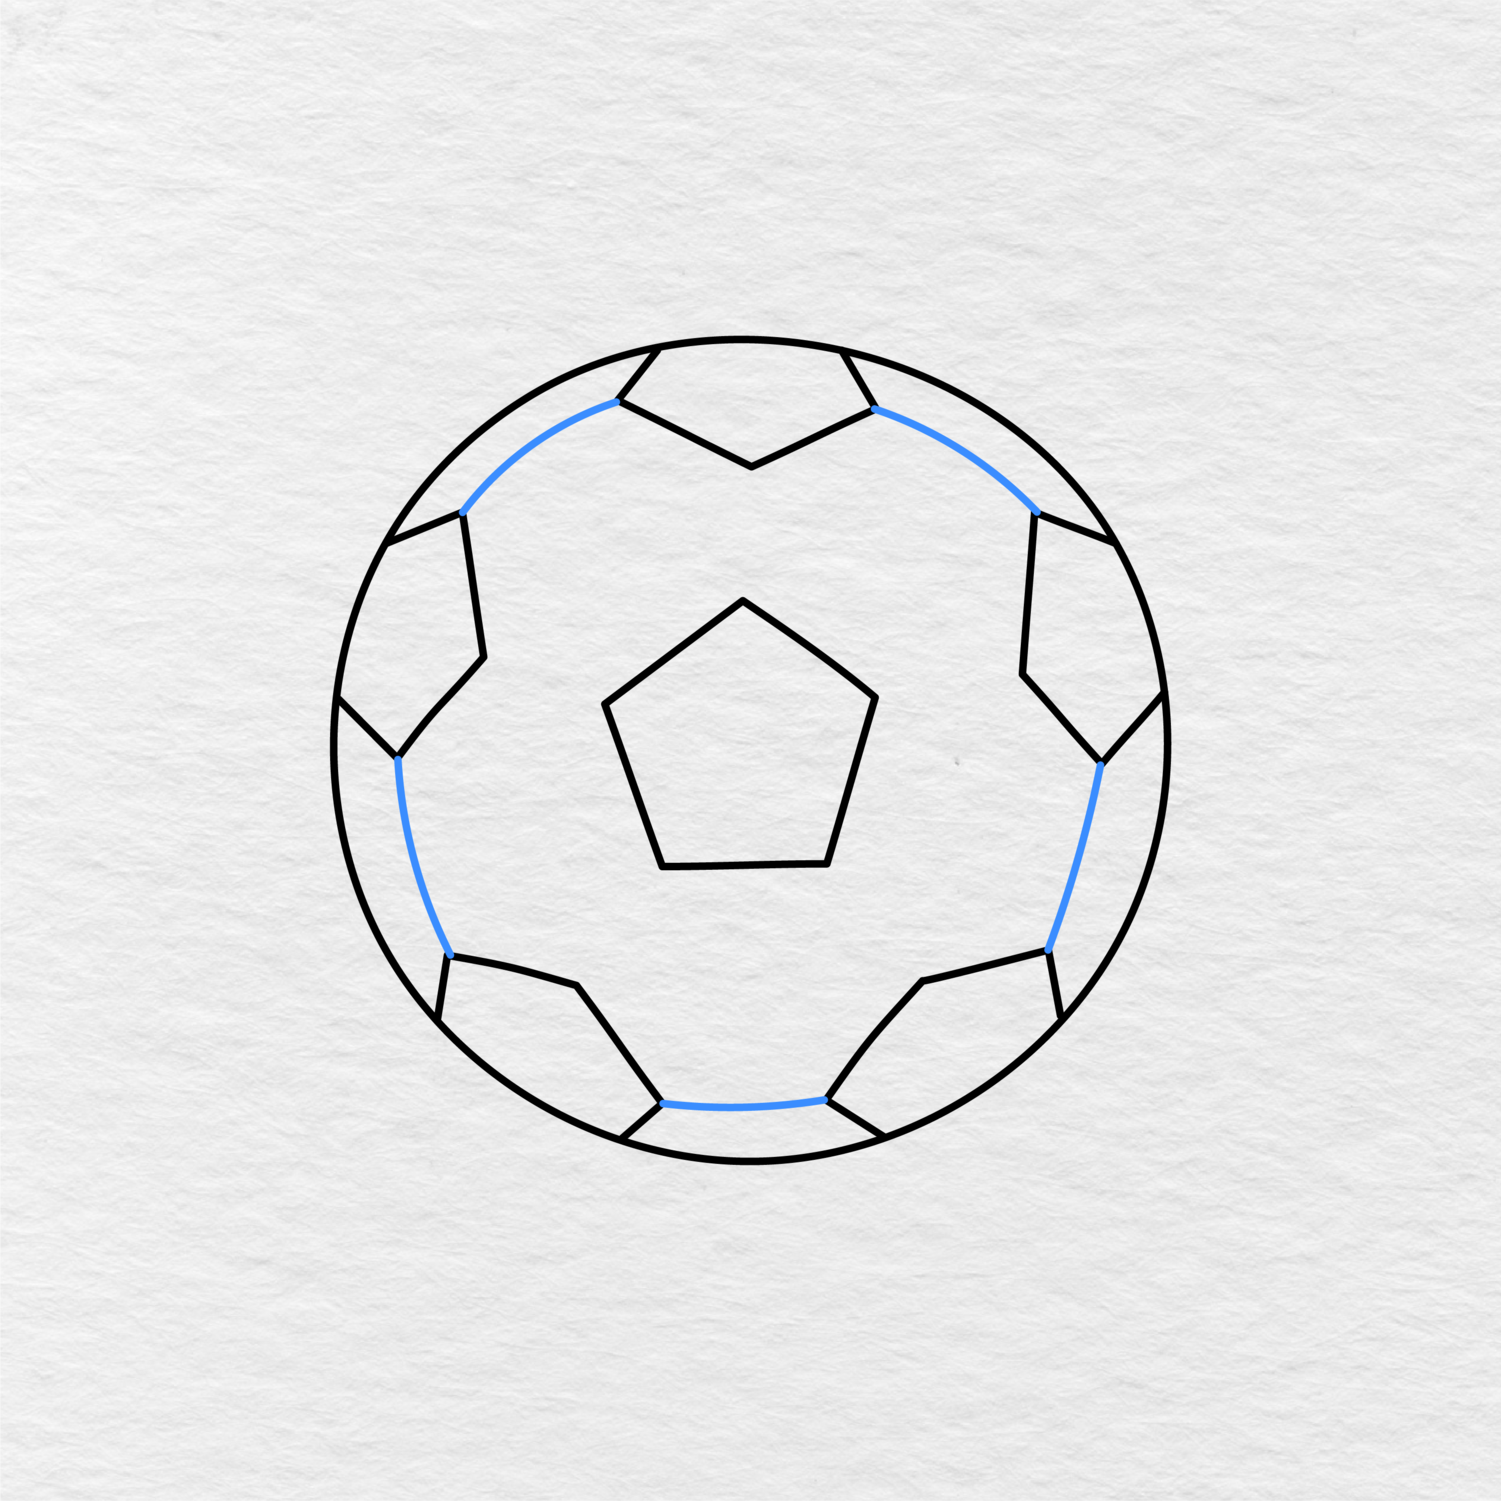
Add five short lines in between the outer panels to connect them together. The lines have to follow the curve of the soccer ball and form a ring around the center pentagon, but they do not have to be perfectly spaced out.
Add the lines one at a time around the ball until you connect all of the outer panels.
Step 6: Complete the Center Panel Lines
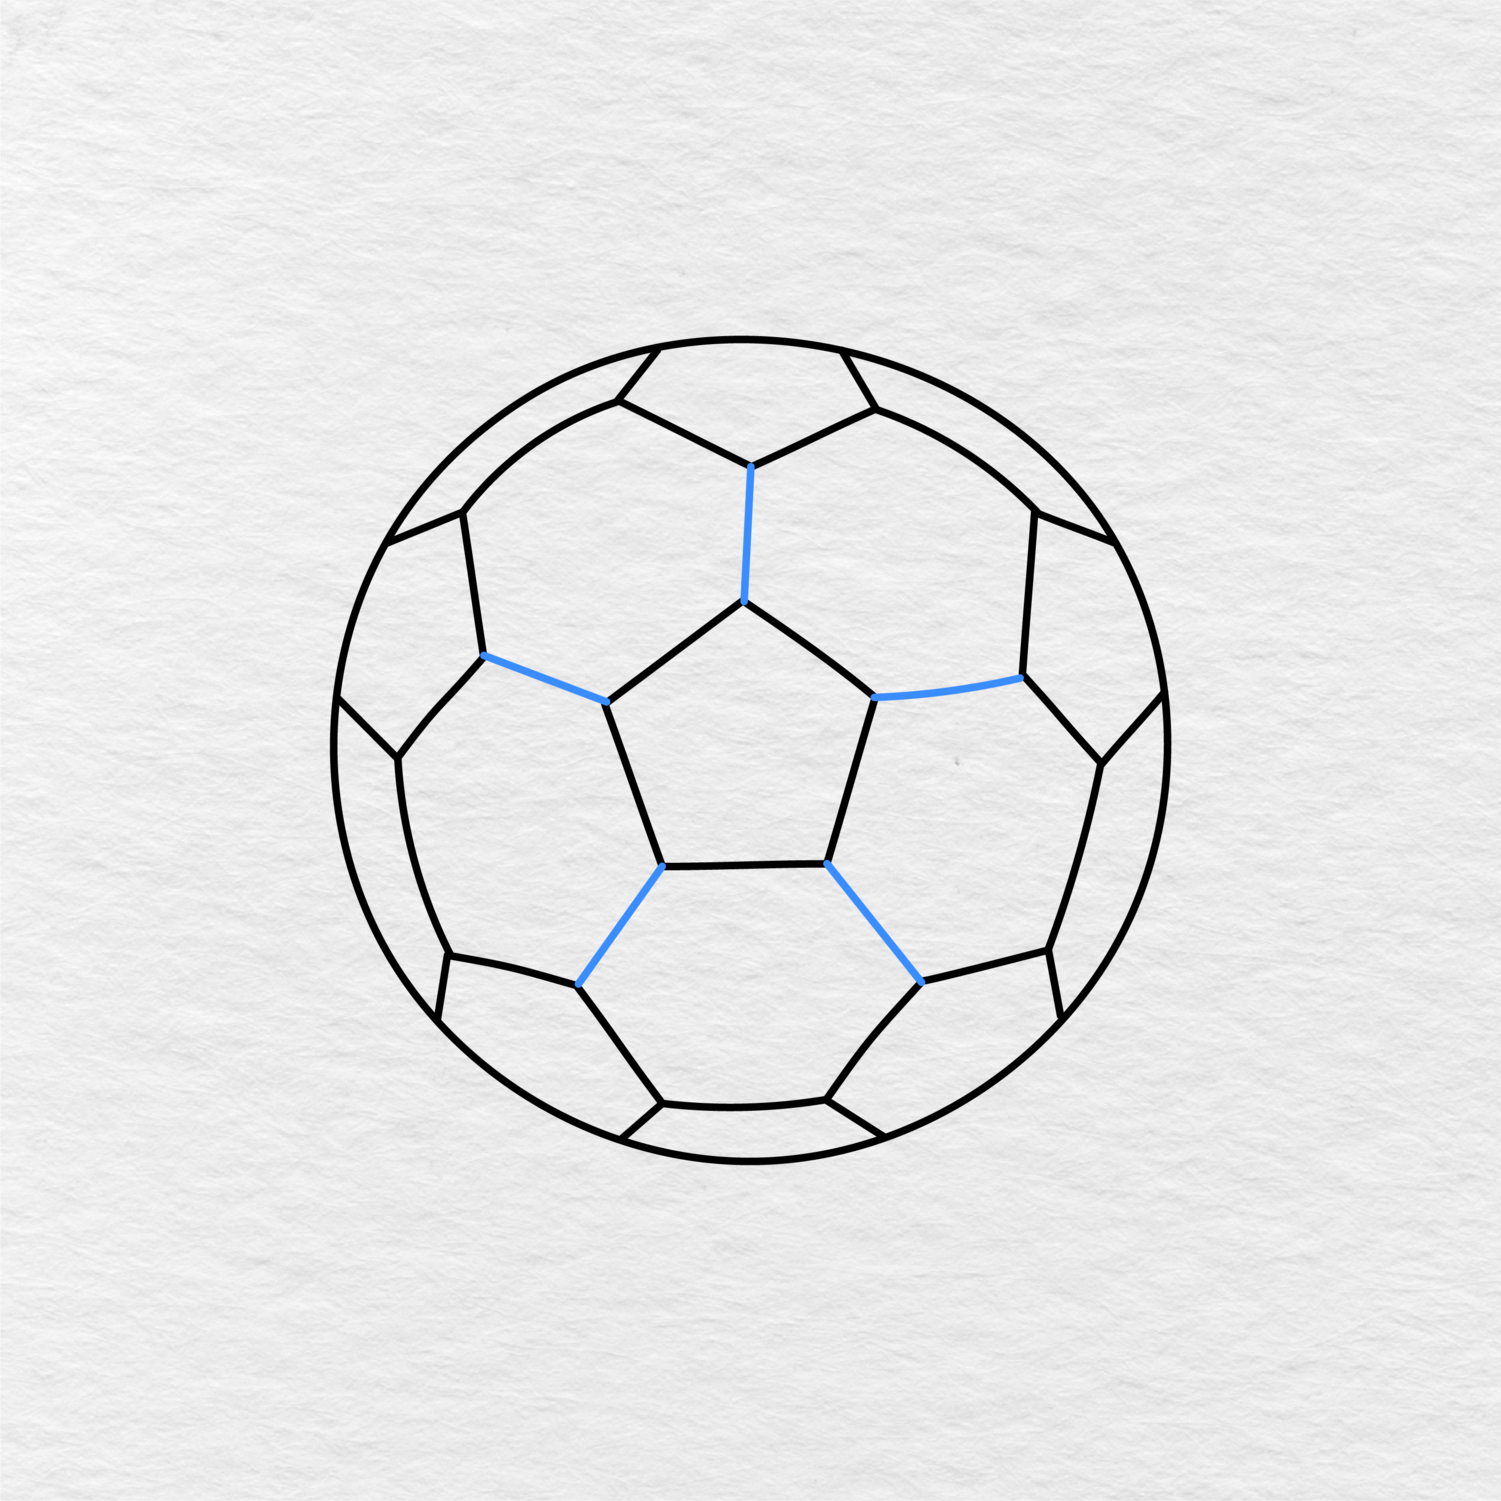
Add five more lines from the center pentagon to the surrounding panel lines. These lines will complete the soccer ball pattern.
Step 7: Color the Soccer Ball
The final step is to color the soccer ball using the finished image below as a guide. Color the center pentagon and the five outer panels black, then leave the larger surrounding panels white.

After the colors are added, your soccer ball drawing is complete and ready to hit the pitch.
Printable Soccer Ball Drawing PDF
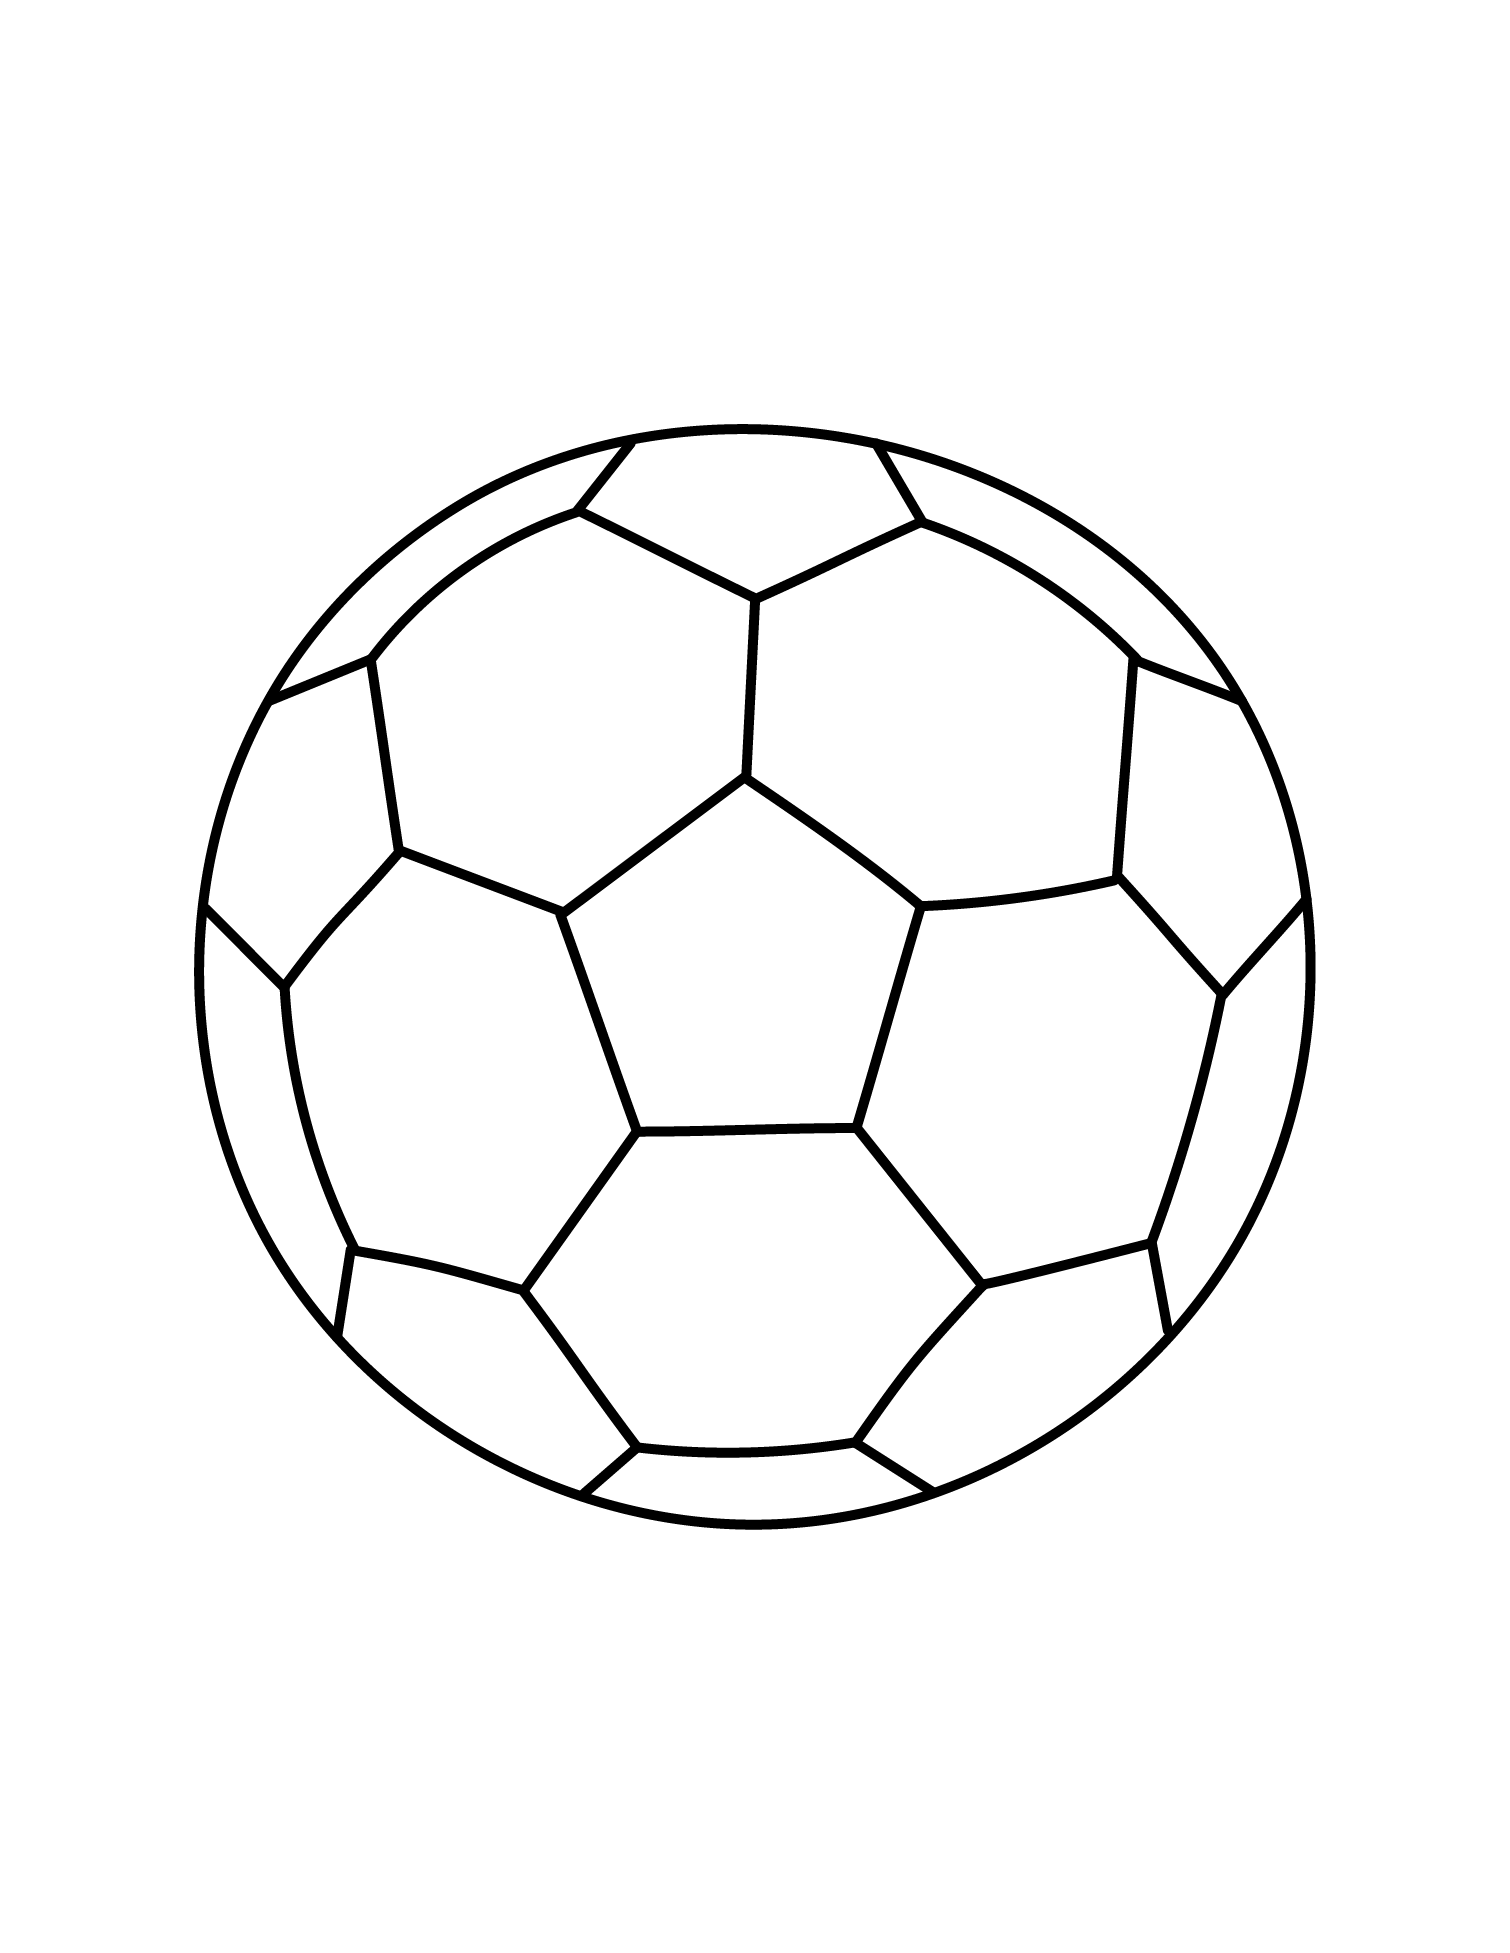
You can also download the final soccer ball drawing as a PDF and color it as a printable coloring page.
The picture below shows the final soccer ball without colors, so kids can print it out and color it in as a fun activity.
If you have enjoyed this soccer ball drawing tutorial and your kids, students, or class want to try coloring this page too, make sure to let us know in the comments below. In addition, remember to share this page with another parent, teacher, or friend that is interested in soccer or drawing.