How to Draw a Spider
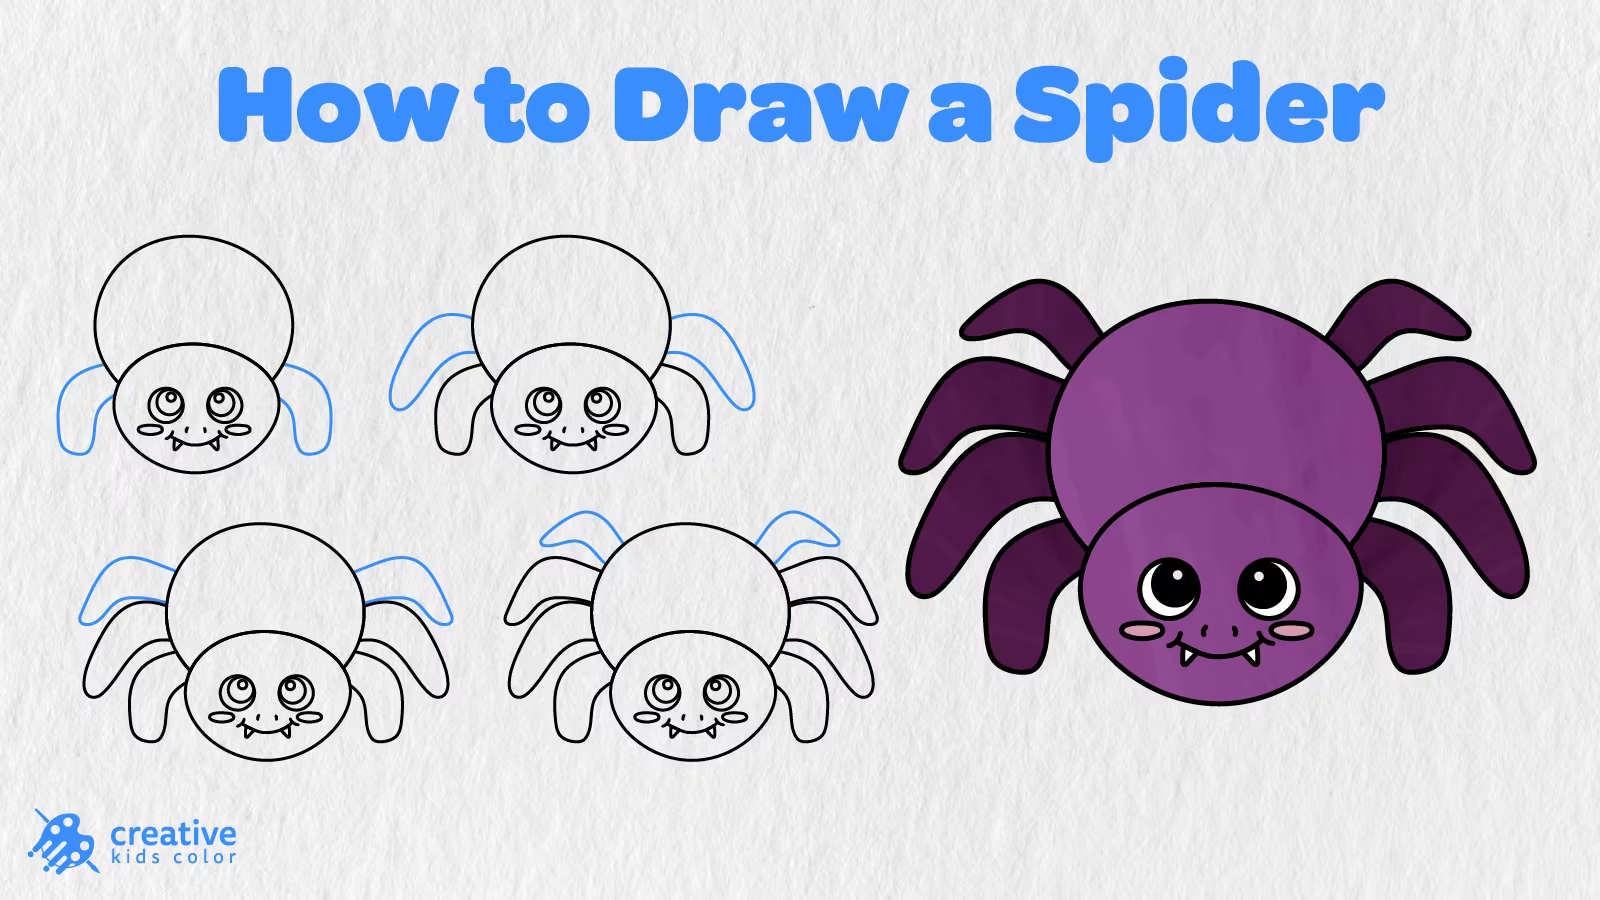
Spiders may be the kind of creepy crawlies that children see in their gardens, in picture books, decorating their Halloween treat bags, or tucked into the corners of windows. But this little spider has been transformed into a cute creature with big eyes, a round tummy, tiny fangs, and eight little legs. Here is an easy step by step guide on how to draw a spider in 11 easy steps.
Spiders can be scary little creatures. But this cute little spider is just the opposite. This spider drawing guide is perfect for kids and beginners, as it includes easy to follow steps on how to draw this little guy. In this guide, you will learn how to draw the two round body shapes, the eyes and inner eye shapes, the mouth, cheeks, two little fangs, and four pairs of legs.
You will also learn how to color this kid friendly spider in. Once you add the purple body, dark purple legs, black eyes with white highlights, pink cheeks, and two tiny fangs, this adorable little spider no longer looks so scary!
Easy Spider Drawing Step by Step
Make sure to have the following drawing supplies on hand before drawing this spider: pencil, paper, eraser, and coloring tools.
The blue lines in the illustrations below show the steps for drawing this spider.
Step 1: Draw the Spider Body Shapes

We will begin by drawing two round shapes. First, draw the bigger shape near the top of the paper for the spider’s body. Then, draw the smaller shape over the lower part of the bigger shape for the spider’s head.
Step 2: Draw the Eyes

Next, we will begin to draw the face by adding two round eyes on the smaller shape, near the middle.
Step 3: Add the Inner Eyes

Now, we will add the inner eye shapes by drawing two smaller curved shapes inside the previously drawn eyes.
Step 4: Add the Eye Highlights
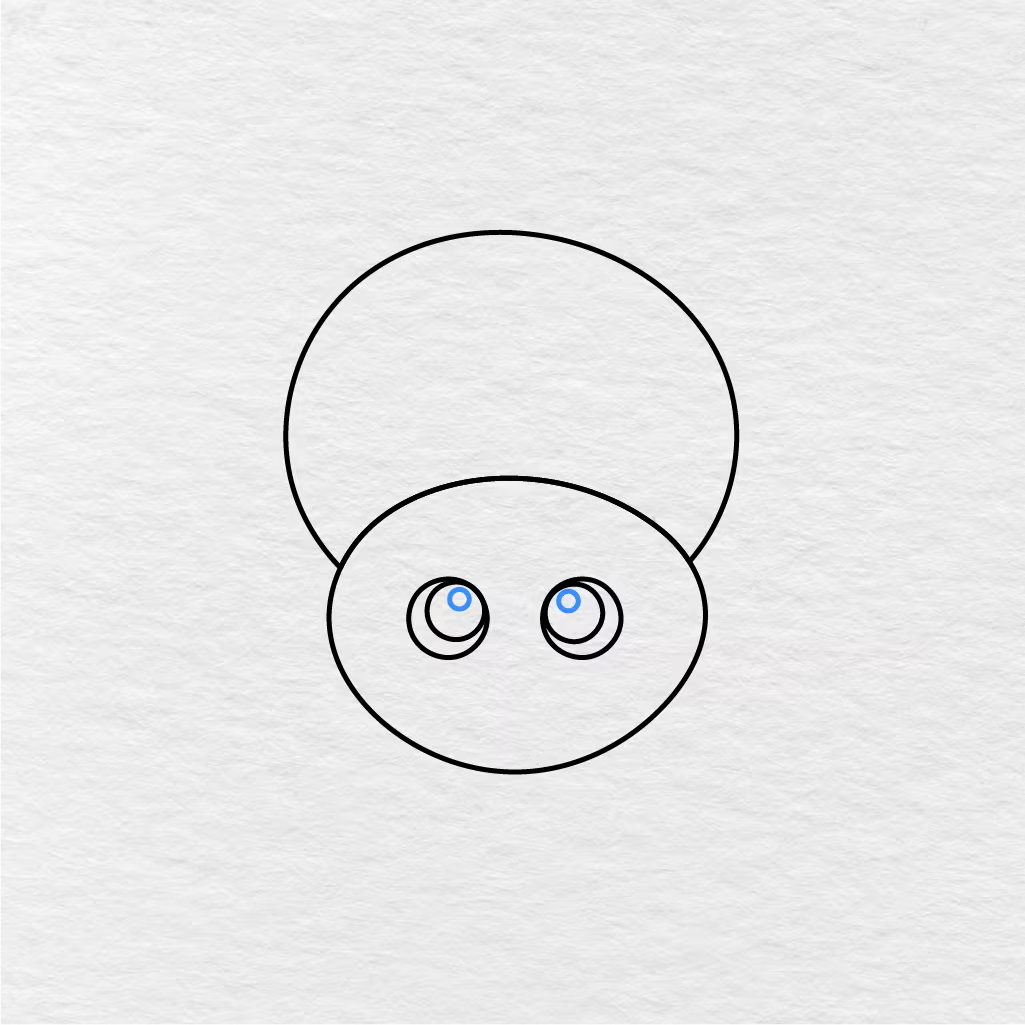
Next, add the eye highlights. Draw a small circle near the top part of each eye.
Step 5: Draw the Mouth

Now draw the smiling little mouth of the spider. Begin by drawing a little curved line near the lower part of the head. Then, add two little marks above the mouth for the nose.
Step 6: Add the Cheeks and Fangs
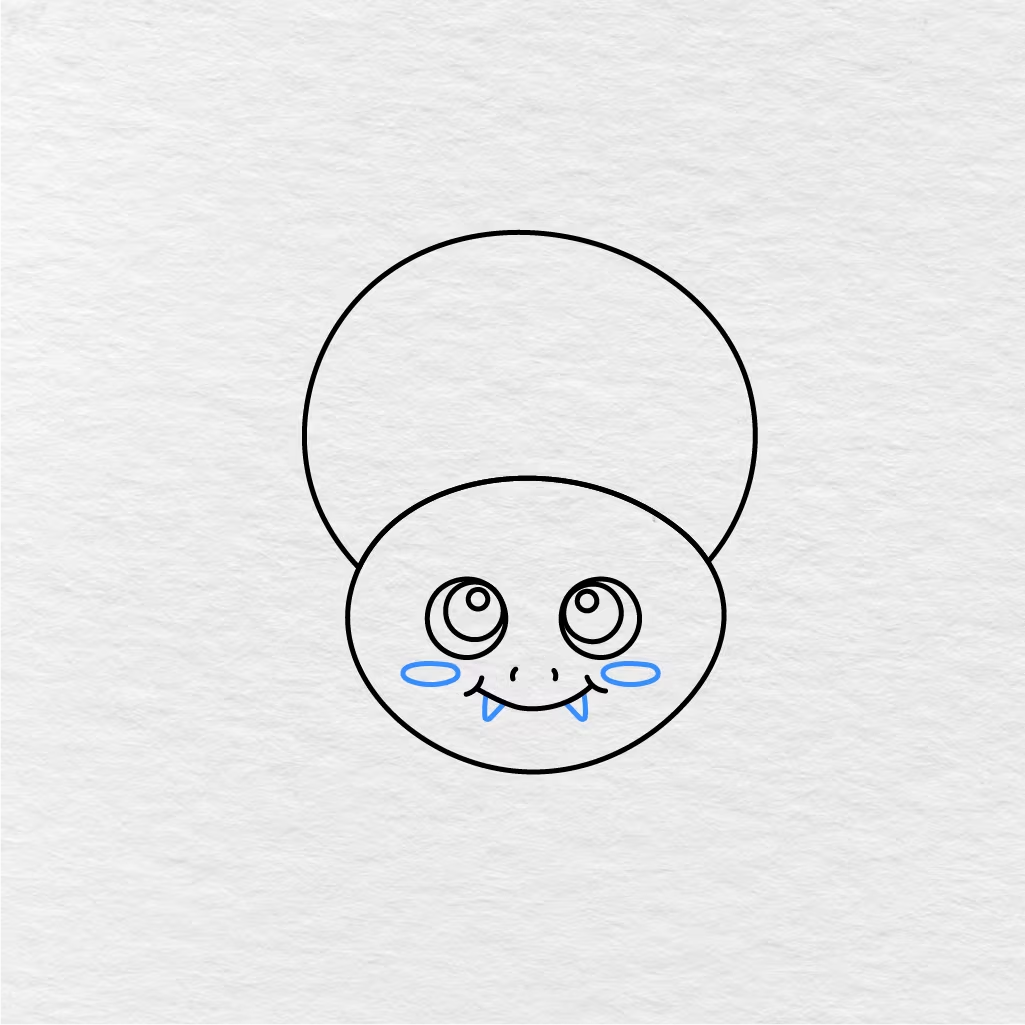
Next, add two oval cheeks near the sides of this little spider’s face. Then, add two tiny fangs under the little smiling mouth.
Step 7: Draw the First Legs
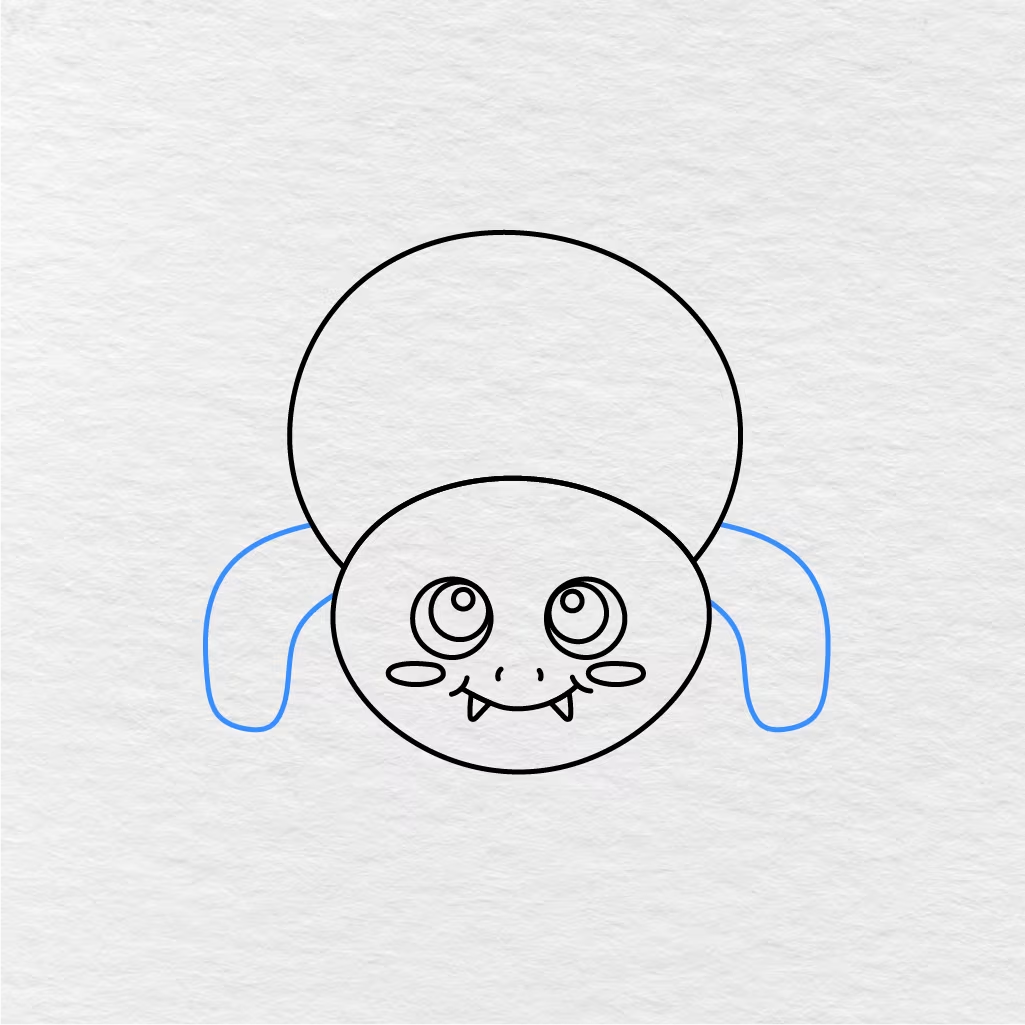
Now add the first two legs on either side of this cute little spider’s body. Begin by drawing the left curved leg. Then, do the same with the right leg. The image below shows how the first two legs should look.
Step 8: Draw the Second Legs
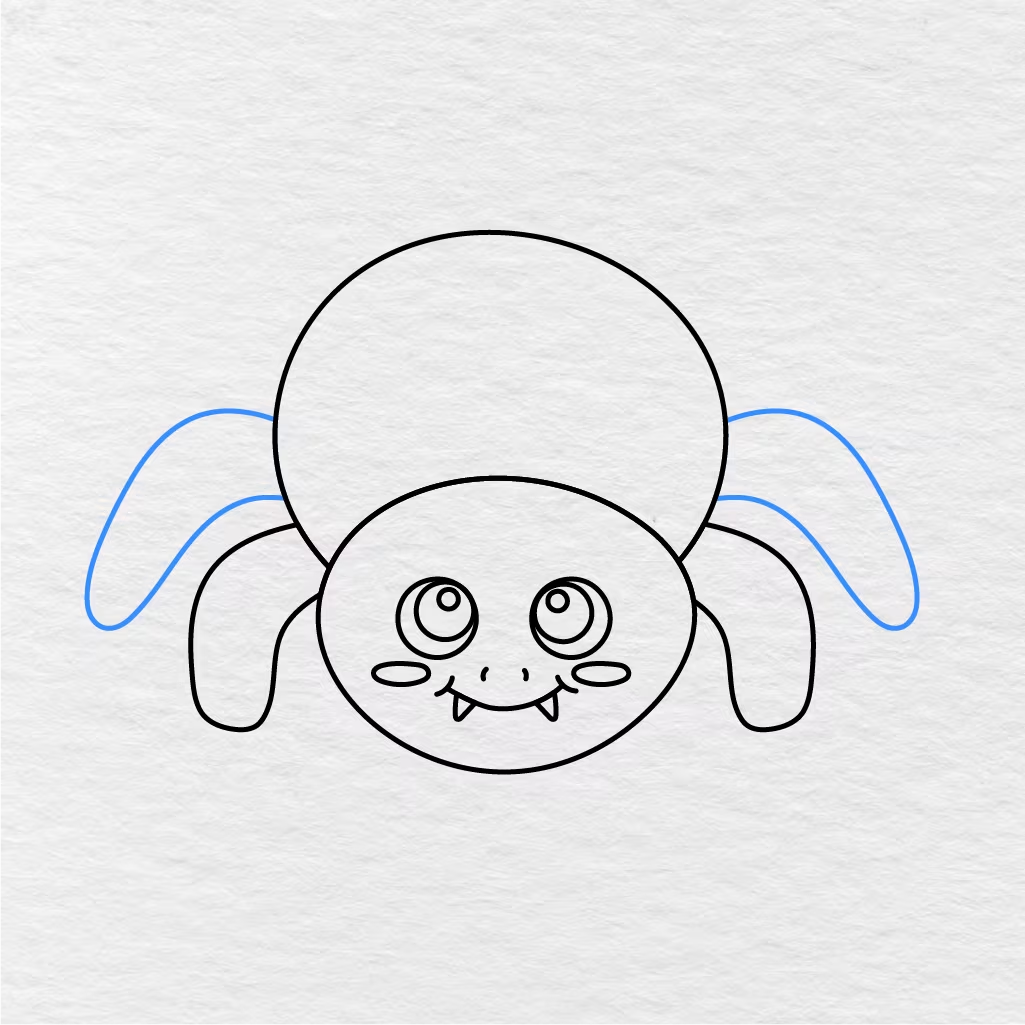
Next, add the next two legs behind the first two legs. These legs should also look like little curved legs. However, unlike the first two legs, they will stick out from the body a little more. Refer to the image below to see how the second pair of legs should look once you are done with this step.
Step 9: Draw the Third Legs
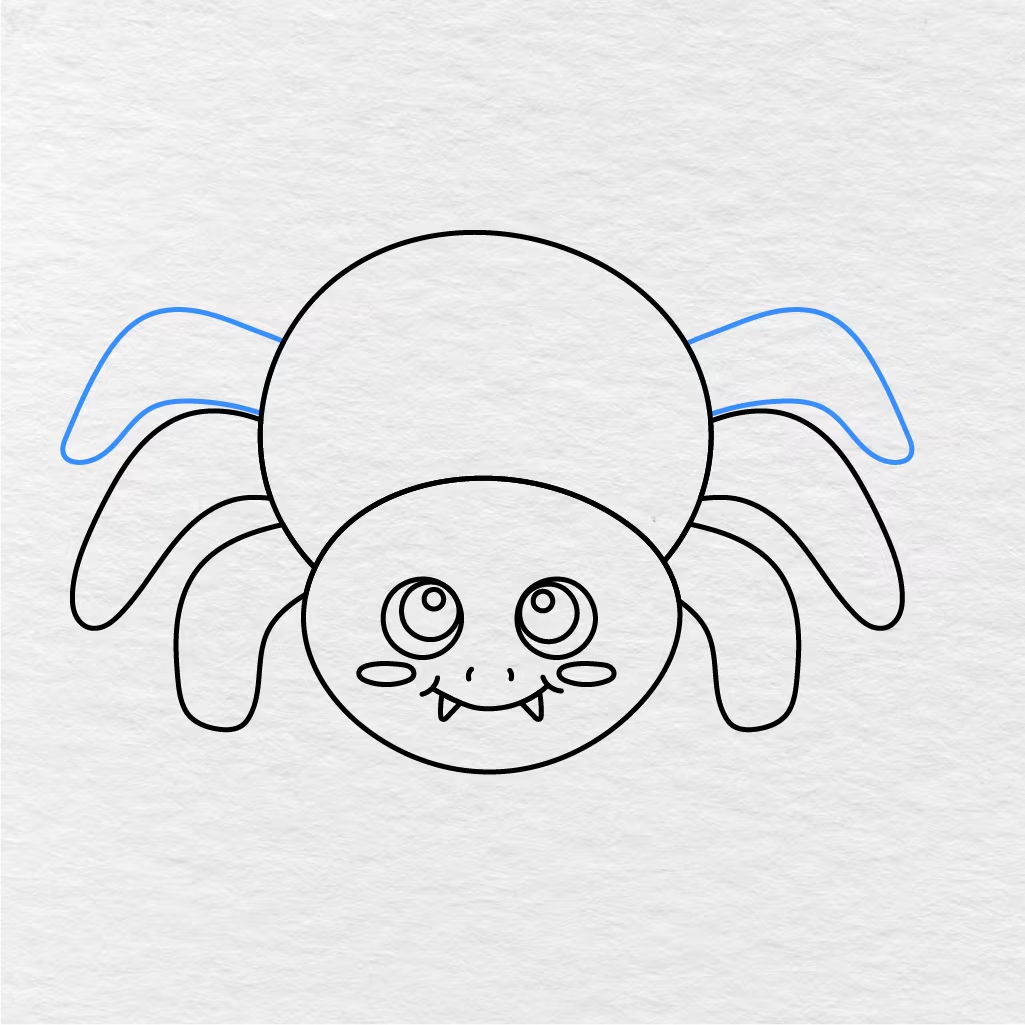
The next step is to add the third pair of legs on either side of the body. As you can see in the image below, they should look similar to the first two pairs of legs. However, they should be a little higher up.
Step 10: Draw the Fourth Legs
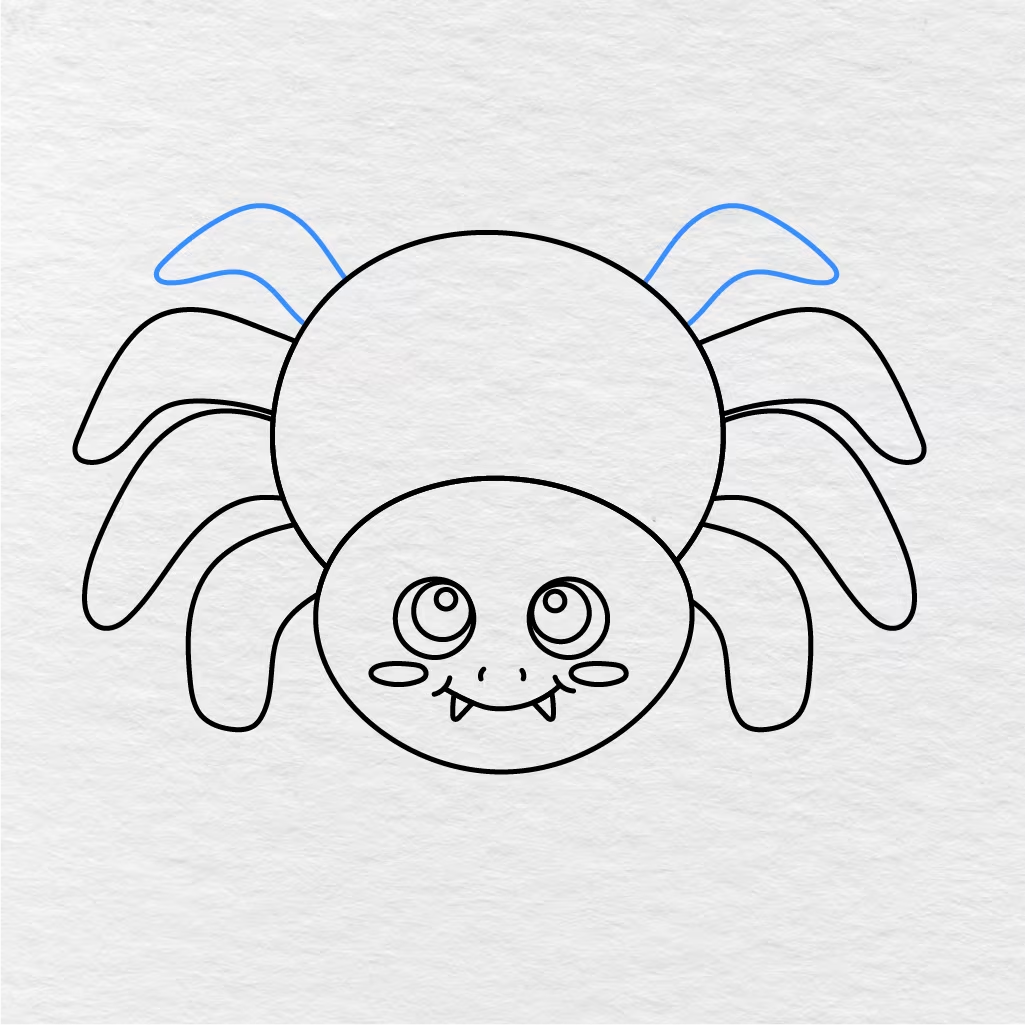
Lastly, add the fourth pair of legs near the top sides of the body. These legs should also look similar to the previous three pairs of legs. Once this step is completed, your spider should have all eight of its little legs.
Step 11: Color the Spider
Using the image below as a reference, color this cute little spider in. For our spider, the body is purple, while the legs are a darker shade of purple. The cheeks are pink, while the eyes are black with white highlights.
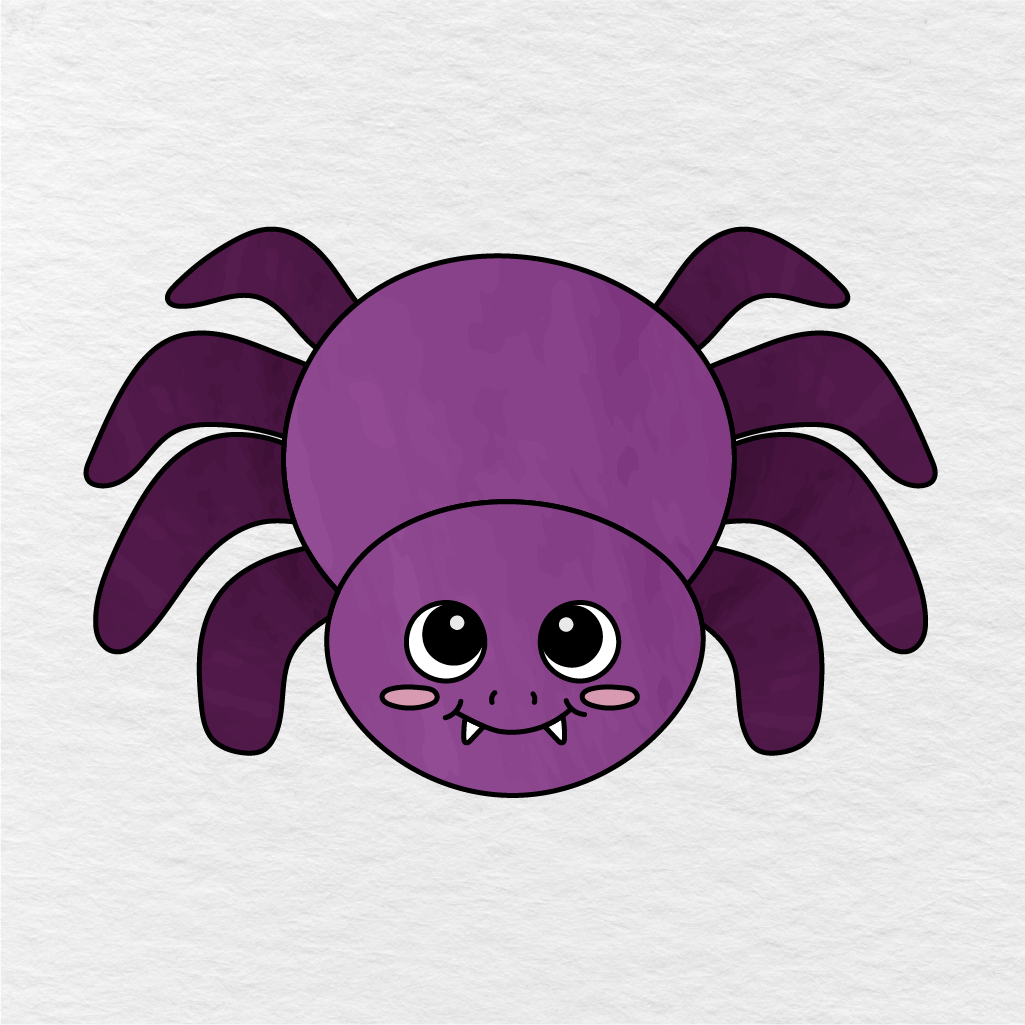
You can use these colors or choose different colors for your adorable little spider. Once you are done coloring, your easy spider drawing is complete!
Printable Spider Drawing PDF
If you wish to print this spider drawing guide as a PDF and color this cute little spider in, you can use the image below. This is a kid friendly spider drawing activity, and kids can print it out and color this cute spider in anytime they want to practice drawing a spider.
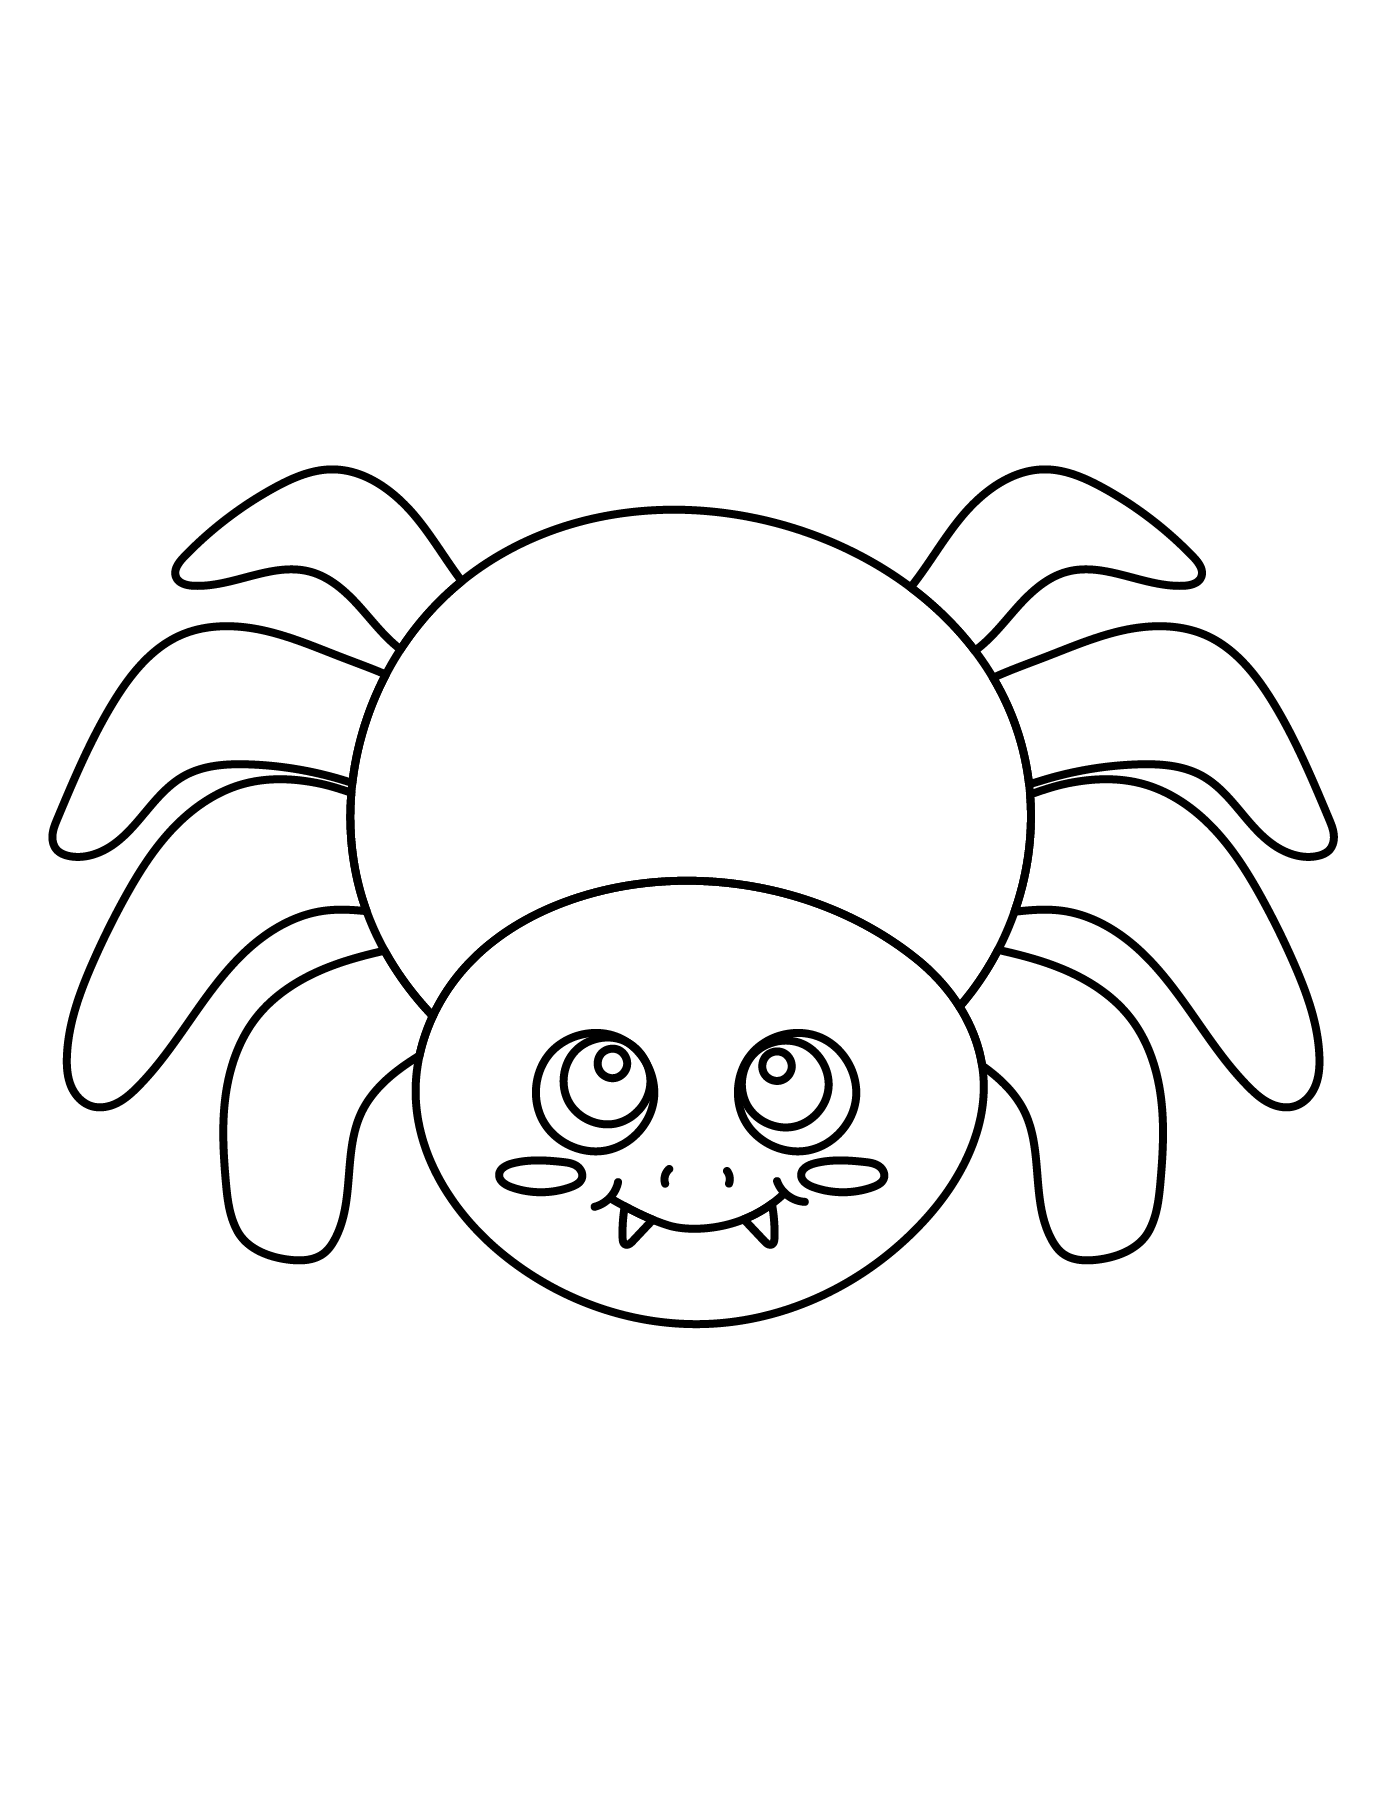
If you enjoyed this easy spider drawing activity, make sure to let us know in the comments below. You can also share this page with another parent, teacher, or friend.